

Your Cart
Your Cart











Polyurethane vs Polyaspartic Flooring: Which Is the Better Choice?
Polyurethane and polyaspartic coatings are both commonly used as protective finishes for concrete floors. They can provide excellent durability, chemical resistance and visual appeal, but they behave very differently during installation.
Polyaspartic is often promoted as the newer and better option because it cures quickly and can offer strong UV stability. However, faster curing is not automatically better for every project.
A conventional polyurethane coating may provide more working time, easier application and a highly durable finish at a lower material cost. Polyaspartic can return a floor to service much faster, but its short working time can make installation considerably less forgiving.
The right choice depends on:
- Location and expected UV exposure
- Required return-to-service time
- Installer experience
- Floor area and complexity
- Application temperature
- Required chemical and abrasion resistance
- Desired appearance
- Product cost
- Complete flooring-system design
This guide explains the practical differences between polyurethane and polyaspartic flooring.
What Is Polyurethane Flooring?
Polyurethane—also known as urethane—is a broad category of polymer coating rather than one single product.
Flooring-grade polyurethane coatings are generally used as protective topcoats over:
- Epoxy flooring
- Decorative flake systems
- Coloured resin floors
- Polished or decorative concrete
- Cementitious flooring systems
- Existing compatible coatings
Polyurethane floor coatings are available in different formulations, including:
- Water-based polyurethane
- Solvent-based polyurethane
- Aliphatic polyurethane
- Aromatic polyurethane
- Single-component products
- Two-component products
- Clear or pigmented finishes
- Gloss, satin or matt finishes
These products can perform very differently. It is therefore inaccurate to assume that every polyurethane coating has the same UV stability, chemical resistance, cure time or application thickness.
Always assess the specific product—not only the word “polyurethane” on the label.
What Is Polyaspartic Flooring?
Polyaspartic coatings are a type of aliphatic polyurea technology developed to provide fast curing while maintaining a more manageable application time than traditional rapid-cure polyurea systems.
Polyaspartic coatings are commonly used for:
- Garage floors
- Workshops
- Retail flooring
- Commercial kitchens
- Warehouses
- Decorative flake systems
- Showrooms
- External covered areas
- Fast-turnaround commercial projects
They can be used as:
- Primers
- Body coats
- Flake broadcast coats
- Clear topcoats
- Pigmented topcoats
However, not every polyaspartic product is suitable for every layer of a flooring system. Some are designed primarily as topcoats, while others are formulated for complete rapid-cure systems.
Polyurethane vs Polyaspartic: Quick Comparison
| Feature | Polyurethane | Polyaspartic |
|---|---|---|
| Working time | Generally longer | Generally shorter |
| Cure speed | Moderate | Very fast |
| Return to service | Usually slower | Usually faster |
| UV stability | Good with suitable aliphatic products | Commonly very good |
| Application difficulty | More forgiving | Less forgiving |
| Temperature flexibility | Product dependent | Often wider, but product dependent |
| Material cost | Generally lower | Generally higher |
| Large-floor application | Easier working time | Requires careful planning and labour |
| Decorative flake topcoat | Commonly used | Commonly used |
| Recoat window | Generally longer | Can be very short |
| DIY suitability | More manageable with the right product | Usually more difficult |
| Moisture sensitivity | Product dependent | Product dependent and can be significant |
This comparison is general. The technical data sheet for the selected product remains the final authority.
Cure Speed
The most obvious difference is cure speed.
Polyurethane
Many polyurethane coatings provide a reasonable working time before they begin to set. This gives the installer more time to:
- Mix the components
- Cut in around edges
- Roll the material evenly
- Maintain a wet edge
- Correct roller marks
- Apply non-slip aggregate
- Work around columns and equipment
Depending on the product and conditions, the floor may require a longer period before recoating, foot traffic or vehicle traffic.
Polyaspartic
Polyaspartic coatings can cure extremely quickly. Some systems allow multiple coats to be applied in one day and may return a floor to service much sooner than conventional systems.
This can be valuable for:
- Commercial businesses with limited shutdown time
- Garage floors that need rapid completion
- Retail spaces
- Workshops
- Food-processing facilities
- Time-sensitive refurbishment projects
The trade-off is reduced working time.
Once mixed, the installer may have only a limited period to spread and finish the material. A small delay, incorrect mix size or slow application can result in roller marks, overlaps or material curing inside the bucket.
Working Time and Application Difficulty
Longer working time generally makes polyurethane more forgiving.
This can be particularly important when the floor has:
- Complicated edges
- Multiple rooms
- Columns
- Drains
- Machinery bases
- Stairs
- Numerous penetrations
- Hot application conditions
- Limited labour
Polyaspartic systems demand better organisation.
Before mixing, the installer should have:
- The floor completely prepared
- All materials measured and ready
- Rollers and brushes unpacked
- A planned application path
- Enough workers for the floor area
- Correct footwear
- Spiked rollers where specified
- Non-slip aggregate ready
- A clear exit route
- Backup equipment available
Fast curing is an advantage only when the crew can apply the material correctly within its working time.
Pot Life Is Not the Same as Working Time
A coating may appear fluid inside the mixing container while becoming difficult to apply correctly on the floor.
The usable working time can be affected by:
- Product temperature
- Concrete temperature
- Air temperature
- Humidity
- Mixed quantity
- Container shape
- Direct sunlight
- Application thickness
Leaving mixed material inside a deep bucket can accelerate heat development. The coating may cure much faster than expected.
Never assume the published pot life provides the same amount of practical rolling time. Follow the manufacturer’s mixing and application instructions precisely.
UV Stability and Yellowing
UV resistance is one of the major reasons polyurethane and polyaspartic coatings are used as topcoats.
Many epoxy coatings can amber or yellow when exposed to sunlight. This is particularly noticeable over:
- Light-coloured flakes
- White flooring
- Grey decorative systems
- Clear finishes
- Areas near open doors
- Floors exposed through windows
Aliphatic Polyurethane
A suitable aliphatic polyurethane can offer very good UV stability and help protect the colour and appearance of the flooring system.
Aromatic polyurethane products may not provide the same colour stability, so the exact formulation matters.
Polyaspartic
Polyaspartic coatings are commonly based on aliphatic chemistry and can provide excellent resistance to yellowing.
This makes them a popular choice for:
- Garage entrances
- Areas receiving natural light
- Decorative flake floors
- Clear topcoats
- Covered external areas
UV stability does not mean the complete flooring system is automatically suitable for permanent outdoor exposure. The primer, body coat, pigments, flakes and substrate conditions must also be considered.
Abrasion and Wear Resistance
Both polyurethane and polyaspartic coatings can provide strong abrasion resistance when correctly specified and applied.
Performance depends on:
- Formulation
- Applied thickness
- Cure conditions
- Surface preparation
- Number of coats
- Traffic type
- Cleaning methods
- Added non-slip aggregate
- Maintenance
A high-quality polyurethane may outperform a lower-quality polyaspartic product, and the reverse may also be true.
Product category alone does not determine durability.
Ask for comparable test data where wear resistance is critical. Ensure the figures were produced using the same test method before making direct comparisons.
Chemical Resistance
Both coating types can resist many common chemicals, but neither should be described as universally chemical-proof.
Exposure may include:
- Petrol
- Diesel
- Engine oil
- Brake fluid
- Cleaning chemicals
- Acids
- Alkalis
- Solvents
- Food products
- Hot tyre contaminants
Chemical resistance depends on:
- Product formulation
- Chemical concentration
- Exposure time
- Temperature
- Whether spills are cleaned quickly
- Coating thickness
- Degree of cure
A brief splash is different from permanent immersion.
For workshops, commercial kitchens and industrial floors, check the manufacturer’s chemical-resistance chart against the actual substances used at the site.
Hot-Tyre Resistance
Garage-floor coatings are often marketed as “hot-tyre resistant,” but tyre-related marking and lifting can involve several factors.
Possible causes include:
- Poor surface preparation
- Weak concrete
- Incorrect primer
- Contamination
- Insufficient cure
- Low coating thickness
- Incompatible layers
- Plasticiser migration from tyres
- Driving onto the floor too early
Both polyurethane and polyaspartic topcoats can perform well in garages when installed as part of a properly designed system.
A premium topcoat cannot compensate for a poorly bonded primer or inadequately prepared concrete underneath it.
Application Thickness
Polyurethane coatings are often applied as relatively thin protective topcoats. Applying them more heavily than specified can cause problems such as:
- Bubbling
- Solvent entrapment
- Slow curing
- Foaming
- Uneven appearance
- Reduced performance
Polyaspartic coatings may allow higher application rates depending on the formulation, but they still have defined minimum and maximum coverage requirements.
Coverage should be calculated from the specified application rate—not guessed from how the floor looks while rolling.
For example:
Floor area ÷ coverage per kit = number of kits required
If a kit covers 30 m² and the floor is 72 m²:
72 ÷ 30 = 2.4 kits
You cannot purchase 0.4 of a kit, so at least three kits are required before allowing for waste, edges and surface texture.
Always calculate material requirements before beginning. Running out halfway through a fast-curing polyaspartic application can leave a permanent join or visible overlap.
Surface Preparation
Neither polyurethane nor polyaspartic should be applied over poorly prepared concrete.
The floor may require:
- Diamond grinding
- Shot blasting
- Coating removal
- Oil and contamination treatment
- Crack repair
- Joint preparation
- Thorough H-class vacuuming
- Moisture testing
The required surface profile depends on the coating and flooring system.
If the product is being applied over an existing coating, confirm:
- The existing coating is firmly bonded
- It is chemically compatible
- It is clean and uncontaminated
- It has been mechanically abraded as specified
- The recoat window has not been exceeded
A coating failure between layers is still a preparation failure, even when the concrete underneath remains sound.
Moisture and Humidity
Moisture can affect both polyurethane and polyaspartic systems.
Potential problems include:
- Bubbling
- Foaming
- Cloudiness
- Pinholes
- Loss of adhesion
- Uneven gloss
- Delamination
Some rapid-cure coatings are particularly sensitive to moisture during application. High humidity, condensation or moisture in the concrete can interfere with the reaction.
Do not assume that a fast-cure product can safely trap or overcome slab moisture.
Check:
- Concrete moisture limits
- Relative humidity
- Dew point
- Surface temperature
- Air temperature
- Manufacturer’s environmental limits
The concrete surface should normally remain sufficiently above the dew point to avoid condensation, in accordance with the selected product’s requirements.
Temperature and Weather Conditions
Polyaspartic coatings are often promoted for application across a wider temperature range. This can be useful in cold conditions, but temperature still affects working time and cure.
In hot weather, polyaspartic material may cure much faster than expected.
This can lead to:
- Roller lines
- Lap marks
- Uneven texture
- Bubbles
- Material setting in the bucket
- Poor connection between application sections
Polyurethane may provide more manageable working time in warm conditions, although excessive heat can still affect application.
Control the conditions where possible and avoid applying coatings to concrete heated by direct sunlight unless permitted by the manufacturer.
Appearance and Finish
Both systems are available in clear and pigmented versions with different gloss levels.
They can be used to create:
- Gloss finishes
- Satin finishes
- Matt finishes
- Decorative flake floors
- Coloured floors
- Non-slip finishes
- Clear protective coats
Polyaspartic coatings can produce a clear, high-gloss appearance that enhances decorative flake systems.
Polyurethane is often chosen when a softer satin or matt finish is desired, although available options depend on the product range.
Appearance can also be affected by application technique. A fast-cure clear coat may show overlaps or roller patterns if it is not applied efficiently.
Slip Resistance
Smooth polyurethane and polyaspartic floors can become slippery, particularly when wet or contaminated with oil.
Slip resistance can be increased by incorporating or broadcasting suitable aggregate into the coating system.
Possible aggregates include:
- Fine polymer particles
- Aluminium oxide
- Silica-based aggregates
- Specialised non-slip additives
More aggregate can improve grip but may also:
- Make the floor harder to clean
- Trap dirt
- Reduce gloss
- Increase roller drag
- Require more coating material
- Create a rougher surface
Slip resistance should be selected according to the environment rather than added as an afterthought.
Recoat Windows
Every coating has a defined period during which the next layer can be applied without additional preparation.
Polyaspartic recoat windows can be particularly short because of the rapid cure.
If the maximum window is exceeded, the surface may require mechanical abrasion before another coat is applied.
Failing to observe the recoat window can cause intercoat adhesion failure even when each individual coating appears properly cured.
Record:
- Mixing time
- Application start time
- Application finish time
- Floor temperature
- Air temperature
- Time of the next coat
On larger projects, accurate records help keep the installation within specification.
Cost Comparison
Polyaspartic coatings generally cost more per litre or kit than conventional polyurethane coatings.
However, material price is only one part of the project cost.
Polyaspartic may reduce:
- Return visits
- Overnight curing delays
- Business shutdown time
- Accommodation and travel costs
- Labour across multiple days
- Equipment-hire periods
Polyurethane may be more economical when:
- Rapid reopening is not required
- The project has a flexible schedule
- The installer needs longer working time
- The floor is large or complicated
- Material cost is a major consideration
The least expensive coating per kit is not necessarily the lowest-cost installed system.
Which Is Better for Garage Floors?
Both can be excellent garage-floor topcoats.
Consider Polyurethane When:
- A longer working time is preferred
- The installer is less experienced
- The floor has complicated edges
- Rapid return to service is not essential
- A satin or matt finish is required
- Material cost needs to be controlled
- The selected polyurethane offers suitable UV and chemical resistance
Consider Polyaspartic When:
- Fast return to service is important
- Multiple coats must be completed quickly
- Strong UV stability is required
- An experienced installation crew is available
- A clear, high-gloss flake-system finish is desired
- The project can support the higher material cost
- Temperature and humidity are within the product’s limits
For many garage floors, a practical system may use an epoxy primer or body coat followed by a polyurethane or polyaspartic topcoat.
The topcoat should be compatible with every layer beneath it.
Which Is Better for Commercial Floors?
The answer depends on the type of business.
Polyaspartic may be valuable for:
- Retail stores
- Commercial workshops
- Showrooms
- Businesses unable to close for several days
- Fast refurbishment projects
Polyurethane may be preferable for:
- Large floors requiring more application time
- Projects where shutdown time is less critical
- Facilities requiring a specific satin or matt finish
- Installations with complicated layouts
- Projects with tighter material budgets
For heavy industrial environments, neither should be selected without confirming the required chemical, thermal and mechanical performance.
Is Polyaspartic Always Better?
No.
Polyaspartic provides real advantages, particularly cure speed and UV stability. But its short working time can increase installation risk.
A rushed or poorly applied polyaspartic system will not outperform a correctly selected and professionally installed polyurethane system.
Polyaspartic is not automatically:
- More chemical resistant
- More abrasion resistant
- More strongly bonded
- More suitable for moisture
- Better for every climate
- Easier to install
- Suitable over every primer
- Appropriate for every DIY project
The formulation and complete system matter more than the marketing category.
Can DIY Users Apply Polyaspartic Flooring?
It is possible, but polyaspartic coatings are less forgiving than many conventional coatings.
Common DIY risks include:
- Mixing too much material
- Underestimating the working time
- Failing to maintain a wet edge
- Running out of material
- Incorrect application thickness
- Poor floor preparation
- Applying in unsuitable conditions
- Missing the recoat window
A polyurethane product with a longer working time may be a more manageable option for an inexperienced installer.
DIY users should never choose a product based only on rapid cure. Fast curing also means less time to correct mistakes.
Questions to Ask Before Choosing
Before selecting polyurethane or polyaspartic, determine:
- Is the floor indoors, outdoors or exposed through open doors?
- How quickly must it return to service?
- What chemicals will contact the floor?
- Will vehicles or forklifts use the area?
- Is gloss, satin or matt preferred?
- Is a non-slip finish required?
- What are the expected application conditions?
- Is the installer experienced with rapid-cure coatings?
- What primer and body coat will be used?
- Are all system layers compatible?
- What is the required coverage rate?
- What are the minimum and maximum recoat windows?
- Has the concrete been moisture tested?
- What surface profile is specified?
- Is current technical documentation available?
Flooring Preparation Equipment from Diamond Tool Warehouse
Correct coating selection is only part of a successful flooring project. The concrete must also be properly prepared.
Diamond Tool Warehouse supplies professional equipment and tooling for floor preparation, including:
- Diamond grinding shoes
- PCD coating-removal tools
- Diamond cup wheels
- Floor grinders
- Edge-grinding equipment
- H-class dust extractors
- Dust hoses and adapters
- Continuous dust bags
- Concrete preparation and repair equipment
Before applying any polyurethane or polyaspartic system, confirm the coating manufacturer’s current requirements for surface preparation, moisture, coverage and application conditions.
Final Verdict
Choose polyurethane when you want longer working time, a more forgiving application and potentially lower material cost.
Choose polyaspartic when rapid curing, fast return to service and strong UV stability are major priorities—and the installer has the experience to manage its shorter working time.
Neither option is automatically superior.
A correctly specified polyurethane floor can outperform an unsuitable polyaspartic installation. Likewise, a properly installed polyaspartic system can dramatically reduce project downtime while delivering an attractive and durable finish.
The best coating is the one that suits the floor, environment, installation conditions and complete system—not simply the product with the fastest cure or strongest marketing claims.
For help selecting concrete surface-preparation equipment before installing a flooring system, contact the team at Diamond Tool Warehouse.
DIY Concrete Grinding: How to Work Out What Equipment and Diamond Tools You Need
DIY concrete grinding can be a practical way to prepare a garage, workshop, patio or small commercial floor—but only if you select the right grinder, diamond tooling and dust-control equipment.
Hiring a grinder without understanding the floor can result in slow progress, damaged concrete, worn-out tools or a surface that still is not ready for coating.
Before ordering equipment, you need to know:
- How many square metres you are grinding
- What is currently on the floor
- How hard the concrete is
- How much material must be removed
- What finish or coating will be applied afterward
- How much edge work is required
- What power is available
- How the concrete dust will be controlled
This guide explains how to work out what you need before beginning a DIY concrete-grinding project.
Step 1: Measure the Floor Area
Start by calculating the total floor area in square metres.
For a rectangular floor:
Length × width = floor area
For example, a garage measuring 6 metres long and 6 metres wide contains:
6 m × 6 m = 36 m²
If the floor has an irregular shape, divide it into smaller rectangles and calculate each section separately.
Example:
- Main floor: 6 m × 5 m = 30 m²
- Side area: 2 m × 1.5 m = 3 m²
- Total grinding area: 33 m²
Measure the actual floor rather than relying on building plans, particularly if benches, walls, stairs or permanent equipment reduce the workable area.
Add approximately 5–10% when planning for overlaps, additional passes and difficult sections.
Step 2: Decide What You Are Trying to Achieve
“Grinding the floor” can mean several different things.
Your objective determines the equipment, diamond grit and number of passes required.
Preparing Concrete for a New Coating
If you are preparing bare concrete for epoxy or another coating, the goal is generally to:
- Remove laitance and weak surface material
- Remove contaminants
- Open the concrete surface
- Produce a consistent mechanical profile
- Leave the floor clean and ready for the specified primer
This may require one main grinding stage followed by detailed edge work, depending on the floor and coating specification.
Removing an Existing Coating
If the floor contains epoxy, paint, glue or waterproofing, you may need specialised coating-removal tools before grinding the exposed concrete.
Thick or flexible materials may require PCD tooling. Standard metal-bond diamonds can clog, glaze or smear when used on unsuitable coatings.
Levelling High Spots
Removing isolated high spots is different from making an entire slab level.
A concrete grinder can reduce minor high areas, but correcting major slab variations may require:
- Larger equipment
- Repeated grinding passes
- Scarifying
- Concrete repair
- Levelling compounds
- Professional assessment
Grinding the entire floor down to match one low spot can remove excessive concrete and expose aggregate.
Polishing Concrete
Concrete polishing is not achieved by completing one pass with a fine diamond tool.
A polished-concrete system normally involves multiple metal and resin diamond stages, repairs, densifier and controlled refinement. DIY polishing requires substantially more equipment, time and experience than basic coating preparation.
Step 3: Identify What Is on the Floor
Inspect the floor carefully before selecting tooling.
Look for:
- Bare concrete
- Paint
- Epoxy
- Tile adhesive
- Carpet glue
- Vinyl adhesive
- Waterproofing membrane
- Concrete sealer
- Levelling compound
- Oil or grease
- Curing compound
- Previous repairs
Do not assume that every grey surface is bare concrete. Thin sealers and clear coatings can be difficult to see.
A small test grind in an inconspicuous area can help determine how the material responds.
If the coating becomes soft, sticky or smears under the grinder, stop. Continuing with conventional diamond tools may clog the segments and spread the material across the floor.
Older coatings, adhesives and construction materials may contain hazardous substances. Arrange appropriate testing if the material is unknown.
Step 4: Choose the Correct Grinder Size
Grinder selection should be based on floor area, access and the amount of material being removed.
Hand Grinder
A hand grinder is useful for:
- Edges
- Corners
- Stairs
- Doorways
- Small high spots
- Areas around fixtures
- Sections inaccessible to a floor grinder
It is not an efficient substitute for a floor grinder across an entire garage. Hand grinding a large floor is slow, physically demanding and more likely to produce an uneven result.
Small Single-Head Floor Grinder
A small single-head grinder may be suitable for:
- Small rooms
- Tight access
- Minor preparation work
- Light coating removal
- Small residential projects
These machines are easy to transport, but their lower weight and smaller grinding width can reduce productivity.
Planetary Floor Grinder
A planetary grinder is generally more suitable for:
- Garages
- Workshops
- Larger rooms
- Coating preparation
- More consistent surface profiling
- Projects requiring multiple grinding stages
A heavier grinder usually produces more consistent contact and higher productivity, but it may require higher-capacity power, specialised transport and greater operator control.
Large Three-Phase Grinder
Large industrial grinders are designed for substantial commercial floors and high production rates.
They may be unnecessary for a small DIY project and can require:
- Three-phase power
- Heavy-duty dust extraction
- Mechanical loading equipment
- Experienced operation
- Larger quantities of tooling
Bigger is not always better. The grinder must suit the area, power supply, access and operator experience.
General Grinder Selection Guide
| Floor size | Practical starting option |
|---|---|
| Edges or isolated repairs | Hand grinder |
| Up to approximately 15 m² | Small floor grinder plus hand grinder |
| Approximately 15–50 m² | Medium floor grinder plus hand grinder |
| Approximately 50–150 m² | Medium or larger planetary grinder |
| More than 150 m² | Professional or industrial grinding setup |
These figures are a starting guide only. A thick coating or badly damaged floor may require heavier equipment regardless of the area.
Step 5: Check the Available Power
Confirm the machine’s electrical requirements before hiring or purchasing it.
Check:
- Voltage
- Plug type
- Current requirement
- Single-phase or three-phase supply
- Recommended circuit capacity
- Extension-lead requirements
- Dust-extractor power requirements
The grinder and dust extractor may need separate electrical circuits. Plugging both machines into the same overloaded circuit can repeatedly trip the power and delay the job.
Use heavy-duty extension leads of the correct capacity. Long, undersized leads can cause voltage drop, overheating and poor machine performance.
Do not assume a standard household power point can operate every concrete grinder.
Step 6: Choose the Correct Diamond Tool
Selecting the correct diamond tool involves more than choosing a grit number.
You must consider:
- Concrete hardness
- Bond hardness
- Coating type
- Required removal rate
- Grinder make and model
- Tooling connection
- Required final profile
Diamond Grit
Lower grit numbers are generally more aggressive.
A simplified guide is:
| Grit range | General purpose |
|---|---|
| Very coarse | Heavy grinding and aggressive material removal |
| Coarse | General concrete grinding and coating preparation |
| Medium | Refining coarse scratches and lighter preparation |
| Fine | Later refinement stages—not heavy removal |
A higher grit number will not remove thick coatings or high spots efficiently. Starting too fine often wastes time and causes the tools to glaze.
The final grit should also suit the coating or finish being installed. Always check the product manufacturer’s current preparation requirements.
Bond Hardness
The bond controls how quickly fresh diamonds are exposed.
The basic rule is:
- Hard concrete generally requires a soft-bond diamond tool.
- Soft or abrasive concrete generally requires a hard-bond diamond tool.
Using the wrong bond can produce slow cutting, glazing or extremely rapid tool wear.
If you do not know the concrete hardness, describe the slab and intended application to the tooling supplier. A test area is still the best way to confirm performance.
Step 7: Determine Whether You Need PCD Tools
PCD tools are designed for aggressive coating removal.
They may be suitable for:
- Thick epoxy
- Heavy floor paint
- Adhesive
- Glue
- Waterproofing membranes
- Multiple coating layers
PCD tools scrape and lift material rather than grinding it in the same way as conventional metal-bond diamonds.
They can also gouge exposed concrete if used incorrectly.
For many coating-removal projects, the process is:
- Remove the bulk coating with suitable PCD tooling.
- Change to metal-bond diamond shoes.
- Remove remaining residue.
- Refine the scratches.
- Produce the profile needed for the new coating.
Do not automatically order the most aggressive PCD tool available. The correct configuration depends on the coating, concrete and grinder.
Step 8: Work Out How Many Diamond Tools You Need
Floor grinders normally require a complete matching set of tools.
The number of shoes depends on the machine. A grinder may use three, six, nine or more grinding shoes at one time.
Before ordering, confirm:
- Grinder make and model
- Tooling connection
- Number of grinding heads
- Number of tool positions
- Head rotation
- Whether directional left- and right-hand PCD tools are required
Do not mix different grits or bond hardnesses on the same grinding stage unless the machine or tooling system specifically calls for it.
Should You Order a Spare Set?
For a small, straightforward bare-concrete floor, one correctly selected set may complete the project—but there is no reliable universal coverage figure.
Tool life changes significantly according to:
- Concrete abrasiveness
- Grinder weight
- Operator technique
- Floor contamination
- Coating thickness
- Tooling bond
- Segment size
- Wet or dry operation
If the project has a fixed completion date, remote location or uncertain concrete, having a spare set can prevent an unfinished floor and another hire period.
The hard truth is that buying too little tooling can cost more than carrying a spare. An additional day of machine hire and lost labour can exceed the value of another tool set.
Step 9: Calculate the Number of Grinding Passes
Grinding calculations should be based on the number of full-floor stages—not only the floor area.
Use this formula:
Floor area × number of full passes = total pass area
For example, a 36 m² garage requiring three full grinding stages involves:
36 m² × 3 = 108 m² of grinding passes
This does not mean you need 108 m² of flooring material. It shows the amount of machine coverage required.
You may also need extra passes for:
- High spots
- Hard concrete sections
- Remaining coating
- Doorways
- Repairs
- Overlapping runs
- Removing scratches from the previous grit
A floor that requires several stages can take much longer than its square-metre measurement suggests.
Step 10: Allow for Edge Grinding
The main floor grinder will not reach tightly against walls, corners, posts and some doorways.
Measure the perimeter:
Length + length + width + width = perimeter
For a 6 m × 6 m garage:
6 + 6 + 6 + 6 = 24 linear metres of edges
Additional edge work may be required around:
- Columns
- Stairs
- Drains
- Machinery bases
- Floor penetrations
- Internal walls
- Cabinets
- Door frames
You will generally need:
- A suitable hand grinder
- Dust shroud
- Correct cup wheel
- Edge-compatible dust hose
- Suitable dust extractor
- Knee protection
Edge work often takes longer than DIY users expect. It should be included in the equipment-hire period.
Step 11: Select a Suitable Cup Wheel
Cup wheels are commonly used with hand grinders for edges and small areas.
Choose the wheel according to the application:
- General-purpose diamond cup wheel for bare concrete
- Coarse cup wheel for aggressive grinding
- PCD cup wheel for suitable coating-removal applications
- Finer cup wheel for controlled scratch refinement
Confirm that the cup wheel:
- Fits the grinder
- Has the correct bore or thread
- Is rated for the grinder’s speed
- Fits inside the dust shroud
- Is suitable for the material being removed
Never use a cup wheel above its rated maximum speed.
Step 12: Use Proper Dust Extraction
Concrete grinding can generate large amounts of respirable crystalline silica dust. A basic domestic or workshop vacuum is not suitable.
For dry concrete grinding, use a properly selected H-class dust extractor appropriate for the grinder and application.
The dust extractor should have:
- Suitable H-class filtration
- Adequate airflow
- Automatic or effective filter cleaning
- Correct hose diameter
- Secure grinder connection
- Safe dust collection
- Suitable disposal bags
The extractor must be large enough to keep up with the grinder. A small vacuum connected to a high-production floor grinder may provide poor dust capture even if the hose fits.
A pre-separator may also be useful on larger or dust-heavy projects because it can capture much of the material before it reaches the extractor filters.
Step 13: Estimate Dust Bags and Disposal Requirements
The amount of dust produced depends on:
- Floor area
- Grinding depth
- Concrete hardness
- Existing coatings
- Number of passes
- Grinder size
- Dust-collection system
There is no accurate universal “one bag per square metre” calculation.
For a small garage, keep multiple correctly sized disposal bags available rather than relying on one bag. Coating fragments and thick concrete removal can fill bags much faster than light surface preparation.
Dust bags should not be packed until they are excessively heavy or difficult to seal safely.
Confirm how grinding dust and removed coatings must be disposed of in your area, particularly if hazardous contamination may be present.
Step 14: Estimate How Long the Job Will Take
Grinding time cannot be calculated accurately from floor area alone.
A clean 36 m² garage with bare, consistent concrete may be much faster than a 20 m² floor covered in several layers of glue.
Allow time for:
- Equipment collection and transport
- Site setup
- Testing the tooling
- Main floor grinding
- Edge grinding
- Tool changes
- Filter maintenance
- Dust-bag changes
- Crack repairs
- Detailed vacuuming
- Equipment cleaning
- Returning hired machinery
For a first-time DIY user, it is safer to allow more time than the equipment supplier’s ideal production rate.
Quoted machine production rates usually assume correct tooling, suitable concrete and an experienced operator. They should not be treated as guaranteed DIY output.
Example: What You May Need for a 36 m² Garage
Assume the garage is 6 m × 6 m, has bare concrete and will receive an epoxy coating.
A typical starting equipment list may include:
- Medium floor grinder
- Complete set of correctly matched metal-bond diamonds
- Hand grinder
- Dust shroud
- Diamond cup wheel
- Suitable H-class dust extractor
- Correct dust hose and adapters
- Heavy-duty extension leads
- Multiple dust-collection bags
- Required personal protective equipment
- Floor-repair materials where necessary
Calculations:
- Main floor area: 36 m²
- Additional 10% allowance: 3.6 m²
- Planning area: approximately 40 m²
- Floor perimeter: 24 linear metres
- Two full-floor passes: 72 m² of machine coverage
- Two passes plus 10% allowance: approximately 80 m² of planned grinding coverage
The required diamond bond and grit still depend on the concrete and the coating manufacturer’s preparation specification.
DIY Concrete-Grinding Checklist
Before starting, confirm the following:
Floor Information
- Total square metres
- Total edge length
- Existing coating or contamination
- Concrete condition
- Cracks and repairs
- High and low areas
- Required final finish
Equipment
- Correct floor grinder
- Hand grinder
- Dust shrouds
- H-class dust extractor
- Pre-separator if required
- Correct hoses and adapters
- Suitable electrical leads
Tooling
- Correct tooling connection
- Complete machine set
- Correct diamond grit
- Correct bond hardness
- PCD tools if required
- Correct cup wheel
- Spare tooling where appropriate
Safety
- Suitable respirator
- Hearing protection
- Safety glasses
- Gloves
- Steel-cap boots
- Knee protection
- Controlled work area
- Safe electrical setup
- Dust-disposal plan
When DIY Grinding May Not Be the Best Option
DIY grinding may not be cost-effective when the floor has:
- Thick or unknown coatings
- Major slab unevenness
- Extensive cracking
- Moisture problems
- Heavy oil contamination
- Soft or damaged concrete
- Hazardous materials
- Large commercial areas
- Limited electrical power
- A decorative polished-concrete finish requirement
Professional grinding can initially appear more expensive, but incorrect DIY preparation can lead to coating failure, another equipment-hire period and the need to grind the floor again.
If the floor condition is uncertain, send clear photographs and complete a small test area before committing to the entire job.
DIY Concrete-Grinding Equipment from Diamond Tool Warehouse
Diamond Tool Warehouse supplies professional equipment and tooling for DIY and trade concrete-grinding projects, including:
- Diamond grinding shoes
- PCD coating-removal tools
- Diamond cup wheels
- Floor grinders
- Hand grinders and dust shrouds
- H-class dust extractors
- Dust hoses and adapters
- Continuous dust bags
- Concrete preparation equipment
To help identify the correct setup, provide:
- Floor area in square metres
- Photographs of the floor
- Description of existing coatings
- Grinder make and model
- Available power
- Required finished result
- Product being installed afterward
The more accurate the project information, the easier it is to avoid hiring or purchasing the wrong equipment.
Final Takeaway
To work out what you need for DIY concrete grinding, begin with the floor—not the machine.
Measure the area and edges, identify what is on the concrete, decide what finish is required and confirm the available power. Then match the grinder, tooling and dust extractor to those conditions.
For most DIY projects, the essential setup includes:
- A correctly sized floor grinder
- A hand grinder for edges
- Diamond tooling matched to the concrete
- PCD tools when suitable for coating removal
- A compatible H-class dust extractor
- Proper safety equipment
- Enough time and spare consumables to complete the job
The cheapest hire package is not necessarily the cheapest way to finish the floor. Correct equipment and tooling can save hours of labour and reduce the risk of having to prepare the concrete twice.
For help working out what you need for your concrete-grinding project, contact Diamond Tool Warehouse with your floor measurements, photographs and required finish.
SEO title: DIY Concrete Grinding: How to Work Out What You Need
Meta description: Planning a DIY concrete-grinding project? Learn how to calculate your floor area, select a grinder, choose diamond tools and arrange safe dust extraction.
Suggested URL: /diy-concrete-grinding-what-equipment-do-i-need
Primary keyword: DIY concrete grinding
Secondary keywords: concrete grinder hire, how to grind concrete, diamond grinding shoes, concrete floor preparation, DIY epoxy floor preparationDIY Concrete Grinding: How to Work Out What Equipment and Diamond Tools You Need
DIY concrete grinding can be a practical way to prepare a garage, workshop, patio or small commercial floor—but only if you select the right grinder, diamond tooling and dust-control equipment.
Hiring a grinder without understanding the floor can result in slow progress, damaged concrete, worn-out tools or a surface that still is not ready for coating.
Before ordering equipment, you need to know:
- How many square metres you are grinding
- What is currently on the floor
- How hard the concrete is
- How much material must be removed
- What finish or coating will be applied afterward
- How much edge work is required
- What power is available
- How the concrete dust will be controlled
This guide explains how to work out what you need before beginning a DIY concrete-grinding project.
Step 1: Measure the Floor Area
Start by calculating the total floor area in square metres.
For a rectangular floor:
Length × width = floor area
For example, a garage measuring 6 metres long and 6 metres wide contains:
6 m × 6 m = 36 m²
If the floor has an irregular shape, divide it into smaller rectangles and calculate each section separately.
Example:
- Main floor: 6 m × 5 m = 30 m²
- Side area: 2 m × 1.5 m = 3 m²
- Total grinding area: 33 m²
Measure the actual floor rather than relying on building plans, particularly if benches, walls, stairs or permanent equipment reduce the workable area.
Add approximately 5–10% when planning for overlaps, additional passes and difficult sections.
Step 2: Decide What You Are Trying to Achieve
“Grinding the floor” can mean several different things.
Your objective determines the equipment, diamond grit and number of passes required.
Preparing Concrete for a New Coating
If you are preparing bare concrete for epoxy or another coating, the goal is generally to:
- Remove laitance and weak surface material
- Remove contaminants
- Open the concrete surface
- Produce a consistent mechanical profile
- Leave the floor clean and ready for the specified primer
This may require one main grinding stage followed by detailed edge work, depending on the floor and coating specification.
Removing an Existing Coating
If the floor contains epoxy, paint, glue or waterproofing, you may need specialised coating-removal tools before grinding the exposed concrete.
Thick or flexible materials may require PCD tooling. Standard metal-bond diamonds can clog, glaze or smear when used on unsuitable coatings.
Levelling High Spots
Removing isolated high spots is different from making an entire slab level.
A concrete grinder can reduce minor high areas, but correcting major slab variations may require:
- Larger equipment
- Repeated grinding passes
- Scarifying
- Concrete repair
- Levelling compounds
- Professional assessment
Grinding the entire floor down to match one low spot can remove excessive concrete and expose aggregate.
Polishing Concrete
Concrete polishing is not achieved by completing one pass with a fine diamond tool.
A polished-concrete system normally involves multiple metal and resin diamond stages, repairs, densifier and controlled refinement. DIY polishing requires substantially more equipment, time and experience than basic coating preparation.
Step 3: Identify What Is on the Floor
Inspect the floor carefully before selecting tooling.
Look for:
- Bare concrete
- Paint
- Epoxy
- Tile adhesive
- Carpet glue
- Vinyl adhesive
- Waterproofing membrane
- Concrete sealer
- Levelling compound
- Oil or grease
- Curing compound
- Previous repairs
Do not assume that every grey surface is bare concrete. Thin sealers and clear coatings can be difficult to see.
A small test grind in an inconspicuous area can help determine how the material responds.
If the coating becomes soft, sticky or smears under the grinder, stop. Continuing with conventional diamond tools may clog the segments and spread the material across the floor.
Older coatings, adhesives and construction materials may contain hazardous substances. Arrange appropriate testing if the material is unknown.
Step 4: Choose the Correct Grinder Size
Grinder selection should be based on floor area, access and the amount of material being removed.
Hand Grinder
A hand grinder is useful for:
- Edges
- Corners
- Stairs
- Doorways
- Small high spots
- Areas around fixtures
- Sections inaccessible to a floor grinder
It is not an efficient substitute for a floor grinder across an entire garage. Hand grinding a large floor is slow, physically demanding and more likely to produce an uneven result.
Small Single-Head Floor Grinder
A small single-head grinder may be suitable for:
- Small rooms
- Tight access
- Minor preparation work
- Light coating removal
- Small residential projects
These machines are easy to transport, but their lower weight and smaller grinding width can reduce productivity.
Planetary Floor Grinder
A planetary grinder is generally more suitable for:
- Garages
- Workshops
- Larger rooms
- Coating preparation
- More consistent surface profiling
- Projects requiring multiple grinding stages
A heavier grinder usually produces more consistent contact and higher productivity, but it may require higher-capacity power, specialised transport and greater operator control.
Large Three-Phase Grinder
Large industrial grinders are designed for substantial commercial floors and high production rates.
They may be unnecessary for a small DIY project and can require:
- Three-phase power
- Heavy-duty dust extraction
- Mechanical loading equipment
- Experienced operation
- Larger quantities of tooling
Bigger is not always better. The grinder must suit the area, power supply, access and operator experience.
General Grinder Selection Guide
| Floor size | Practical starting option |
|---|---|
| Edges or isolated repairs | Hand grinder |
| Up to approximately 15 m² | Small floor grinder plus hand grinder |
| Approximately 15–50 m² | Medium floor grinder plus hand grinder |
| Approximately 50–150 m² | Medium or larger planetary grinder |
| More than 150 m² | Professional or industrial grinding setup |
These figures are a starting guide only. A thick coating or badly damaged floor may require heavier equipment regardless of the area.
Step 5: Check the Available Power
Confirm the machine’s electrical requirements before hiring or purchasing it.
Check:
- Voltage
- Plug type
- Current requirement
- Single-phase or three-phase supply
- Recommended circuit capacity
- Extension-lead requirements
- Dust-extractor power requirements
The grinder and dust extractor may need separate electrical circuits. Plugging both machines into the same overloaded circuit can repeatedly trip the power and delay the job.
Use heavy-duty extension leads of the correct capacity. Long, undersized leads can cause voltage drop, overheating and poor machine performance.
Do not assume a standard household power point can operate every concrete grinder.
Step 6: Choose the Correct Diamond Tool
Selecting the correct diamond tool involves more than choosing a grit number.
You must consider:
- Concrete hardness
- Bond hardness
- Coating type
- Required removal rate
- Grinder make and model
- Tooling connection
- Required final profile
Diamond Grit
Lower grit numbers are generally more aggressive.
A simplified guide is:
| Grit range | General purpose |
|---|---|
| Very coarse | Heavy grinding and aggressive material removal |
| Coarse | General concrete grinding and coating preparation |
| Medium | Refining coarse scratches and lighter preparation |
| Fine | Later refinement stages—not heavy removal |
A higher grit number will not remove thick coatings or high spots efficiently. Starting too fine often wastes time and causes the tools to glaze.
The final grit should also suit the coating or finish being installed. Always check the product manufacturer’s current preparation requirements.
Bond Hardness
The bond controls how quickly fresh diamonds are exposed.
The basic rule is:
- Hard concrete generally requires a soft-bond diamond tool.
- Soft or abrasive concrete generally requires a hard-bond diamond tool.
Using the wrong bond can produce slow cutting, glazing or extremely rapid tool wear.
If you do not know the concrete hardness, describe the slab and intended application to the tooling supplier. A test area is still the best way to confirm performance.
Step 7: Determine Whether You Need PCD Tools
PCD tools are designed for aggressive coating removal.
They may be suitable for:
- Thick epoxy
- Heavy floor paint
- Adhesive
- Glue
- Waterproofing membranes
- Multiple coating layers
PCD tools scrape and lift material rather than grinding it in the same way as conventional metal-bond diamonds.
They can also gouge exposed concrete if used incorrectly.
For many coating-removal projects, the process is:
- Remove the bulk coating with suitable PCD tooling.
- Change to metal-bond diamond shoes.
- Remove remaining residue.
- Refine the scratches.
- Produce the profile needed for the new coating.
Do not automatically order the most aggressive PCD tool available. The correct configuration depends on the coating, concrete and grinder.
Step 8: Work Out How Many Diamond Tools You Need
Floor grinders normally require a complete matching set of tools.
The number of shoes depends on the machine. A grinder may use three, six, nine or more grinding shoes at one time.
Before ordering, confirm:
- Grinder make and model
- Tooling connection
- Number of grinding heads
- Number of tool positions
- Head rotation
- Whether directional left- and right-hand PCD tools are required
Do not mix different grits or bond hardnesses on the same grinding stage unless the machine or tooling system specifically calls for it.
Should You Order a Spare Set?
For a small, straightforward bare-concrete floor, one correctly selected set may complete the project—but there is no reliable universal coverage figure.
Tool life changes significantly according to:
- Concrete abrasiveness
- Grinder weight
- Operator technique
- Floor contamination
- Coating thickness
- Tooling bond
- Segment size
- Wet or dry operation
If the project has a fixed completion date, remote location or uncertain concrete, having a spare set can prevent an unfinished floor and another hire period.
The hard truth is that buying too little tooling can cost more than carrying a spare. An additional day of machine hire and lost labour can exceed the value of another tool set.
Step 9: Calculate the Number of Grinding Passes
Grinding calculations should be based on the number of full-floor stages—not only the floor area.
Use this formula:
Floor area × number of full passes = total pass area
For example, a 36 m² garage requiring three full grinding stages involves:
36 m² × 3 = 108 m² of grinding passes
This does not mean you need 108 m² of flooring material. It shows the amount of machine coverage required.
You may also need extra passes for:
- High spots
- Hard concrete sections
- Remaining coating
- Doorways
- Repairs
- Overlapping runs
- Removing scratches from the previous grit
A floor that requires several stages can take much longer than its square-metre measurement suggests.
Step 10: Allow for Edge Grinding
The main floor grinder will not reach tightly against walls, corners, posts and some doorways.
Measure the perimeter:
Length + length + width + width = perimeter
For a 6 m × 6 m garage:
6 + 6 + 6 + 6 = 24 linear metres of edges
Additional edge work may be required around:
- Columns
- Stairs
- Drains
- Machinery bases
- Floor penetrations
- Internal walls
- Cabinets
- Door frames
You will generally need:
- A suitable hand grinder
- Dust shroud
- Correct cup wheel
- Edge-compatible dust hose
- Suitable dust extractor
- Knee protection
Edge work often takes longer than DIY users expect. It should be included in the equipment-hire period.
Step 11: Select a Suitable Cup Wheel
Cup wheels are commonly used with hand grinders for edges and small areas.
Choose the wheel according to the application:
- General-purpose diamond cup wheel for bare concrete
- Coarse cup wheel for aggressive grinding
- PCD cup wheel for suitable coating-removal applications
- Finer cup wheel for controlled scratch refinement
Confirm that the cup wheel:
- Fits the grinder
- Has the correct bore or thread
- Is rated for the grinder’s speed
- Fits inside the dust shroud
- Is suitable for the material being removed
Never use a cup wheel above its rated maximum speed.
Step 12: Use Proper Dust Extraction
Concrete grinding can generate large amounts of respirable crystalline silica dust. A basic domestic or workshop vacuum is not suitable.
For dry concrete grinding, use a properly selected H-class dust extractor appropriate for the grinder and application.
The dust extractor should have:
- Suitable H-class filtration
- Adequate airflow
- Automatic or effective filter cleaning
- Correct hose diameter
- Secure grinder connection
- Safe dust collection
- Suitable disposal bags
The extractor must be large enough to keep up with the grinder. A small vacuum connected to a high-production floor grinder may provide poor dust capture even if the hose fits.
A pre-separator may also be useful on larger or dust-heavy projects because it can capture much of the material before it reaches the extractor filters.
Step 13: Estimate Dust Bags and Disposal Requirements
The amount of dust produced depends on:
- Floor area
- Grinding depth
- Concrete hardness
- Existing coatings
- Number of passes
- Grinder size
- Dust-collection system
There is no accurate universal “one bag per square metre” calculation.
For a small garage, keep multiple correctly sized disposal bags available rather than relying on one bag. Coating fragments and thick concrete removal can fill bags much faster than light surface preparation.
Dust bags should not be packed until they are excessively heavy or difficult to seal safely.
Confirm how grinding dust and removed coatings must be disposed of in your area, particularly if hazardous contamination may be present.
Step 14: Estimate How Long the Job Will Take
Grinding time cannot be calculated accurately from floor area alone.
A clean 36 m² garage with bare, consistent concrete may be much faster than a 20 m² floor covered in several layers of glue.
Allow time for:
- Equipment collection and transport
- Site setup
- Testing the tooling
- Main floor grinding
- Edge grinding
- Tool changes
- Filter maintenance
- Dust-bag changes
- Crack repairs
- Detailed vacuuming
- Equipment cleaning
- Returning hired machinery
For a first-time DIY user, it is safer to allow more time than the equipment supplier’s ideal production rate.
Quoted machine production rates usually assume correct tooling, suitable concrete and an experienced operator. They should not be treated as guaranteed DIY output.
Example: What You May Need for a 36 m² Garage
Assume the garage is 6 m × 6 m, has bare concrete and will receive an epoxy coating.
A typical starting equipment list may include:
- Medium floor grinder
- Complete set of correctly matched metal-bond diamonds
- Hand grinder
- Dust shroud
- Diamond cup wheel
- Suitable H-class dust extractor
- Correct dust hose and adapters
- Heavy-duty extension leads
- Multiple dust-collection bags
- Required personal protective equipment
- Floor-repair materials where necessary
Calculations:
- Main floor area: 36 m²
- Additional 10% allowance: 3.6 m²
- Planning area: approximately 40 m²
- Floor perimeter: 24 linear metres
- Two full-floor passes: 72 m² of machine coverage
- Two passes plus 10% allowance: approximately 80 m² of planned grinding coverage
The required diamond bond and grit still depend on the concrete and the coating manufacturer’s preparation specification.
DIY Concrete-Grinding Checklist
Before starting, confirm the following:
Floor Information
- Total square metres
- Total edge length
- Existing coating or contamination
- Concrete condition
- Cracks and repairs
- High and low areas
- Required final finish
Equipment
- Correct floor grinder
- Hand grinder
- Dust shrouds
- H-class dust extractor
- Pre-separator if required
- Correct hoses and adapters
- Suitable electrical leads
Tooling
- Correct tooling connection
- Complete machine set
- Correct diamond grit
- Correct bond hardness
- PCD tools if required
- Correct cup wheel
- Spare tooling where appropriate
Safety
- Suitable respirator
- Hearing protection
- Safety glasses
- Gloves
- Steel-cap boots
- Knee protection
- Controlled work area
- Safe electrical setup
- Dust-disposal plan
When DIY Grinding May Not Be the Best Option
DIY grinding may not be cost-effective when the floor has:
- Thick or unknown coatings
- Major slab unevenness
- Extensive cracking
- Moisture problems
- Heavy oil contamination
- Soft or damaged concrete
- Hazardous materials
- Large commercial areas
- Limited electrical power
- A decorative polished-concrete finish requirement
Professional grinding can initially appear more expensive, but incorrect DIY preparation can lead to coating failure, another equipment-hire period and the need to grind the floor again.
If the floor condition is uncertain, send clear photographs and complete a small test area before committing to the entire job.
DIY Concrete-Grinding Equipment from Diamond Tool Warehouse
Diamond Tool Warehouse supplies professional equipment and tooling for DIY and trade concrete-grinding projects, including:
- Diamond grinding shoes
- PCD coating-removal tools
- Diamond cup wheels
- Floor grinders
- Hand grinders and dust shrouds
- H-class dust extractors
- Dust hoses and adapters
- Continuous dust bags
- Concrete preparation equipment
To help identify the correct setup, provide:
- Floor area in square metres
- Photographs of the floor
- Description of existing coatings
- Grinder make and model
- Available power
- Required finished result
- Product being installed afterward
The more accurate the project information, the easier it is to avoid hiring or purchasing the wrong equipment.
Final Takeaway
To work out what you need for DIY concrete grinding, begin with the floor—not the machine.
Measure the area and edges, identify what is on the concrete, decide what finish is required and confirm the available power. Then match the grinder, tooling and dust extractor to those conditions.
For most DIY projects, the essential setup includes:
- A correctly sized floor grinder
- A hand grinder for edges
- Diamond tooling matched to the concrete
- PCD tools when suitable for coating removal
- A compatible H-class dust extractor
- Proper safety equipment
- Enough time and spare consumables to complete the job
The cheapest hire package is not necessarily the cheapest way to finish the floor. Correct equipment and tooling can save hours of labour and reduce the risk of having to prepare the concrete twice.
For help working out what you need for your concrete-grinding project, contact Diamond Tool Warehouse with your floor measurements, photographs and required finish.
A concrete coating is only as reliable as the surface underneath it.
When epoxy, polyurethane, polyaspartic or waterproofing systems peel, blister or delaminate, the coating itself is often blamed. In many cases, however, the real cause is inadequate concrete preparation.
Professional surface preparation is not an optional extra. It creates the clean, sound and properly profiled surface needed for the coating system to bond correctly.
This guide covers the most common preparation mistakes, the warning signs of coating failure and how contractors can reduce the risk of costly repairs.
Why Surface Preparation Matters
Concrete may appear solid and clean while still containing materials that interfere with adhesion.
Possible contaminants include:
- Curing compounds
- Concrete sealers
- Oil and grease
- Paint
- Adhesive residue
- Dust
- Laitance
- Weak or deteriorated concrete
- Cleaning chemicals
- Moisture-related deposits
Applying a coating over these materials can prevent it from bonding directly to sound concrete.
Surface preparation should remove contamination and weak material while creating a suitable mechanical profile. The exact preparation requirement depends on the coating system and the condition of the floor.
Mistake 1: Cleaning the Floor Without Mechanically Preparing It
Washing, degreasing or acid cleaning a floor is not the same as mechanically preparing it.
Cleaning may remove loose dirt and some surface contamination, but it usually does not provide the controlled surface profile required by professional resin flooring systems.
Mechanical preparation methods can include:
- Diamond grinding
- Shot blasting
- Scarifying
- PCD coating removal
- Hand grinding around edges and penetrations
The correct method will depend on the concrete, existing surface materials and required Concrete Surface Profile.
Mistake 2: Using the Wrong Diamond Tooling
Not every diamond grinding shoe is suitable for every floor.
Important factors include:
- Concrete hardness
- Bond hardness
- Diamond grit
- Segment design
- Grinder weight and power
- Existing coatings
- Required removal rate
- Desired surface profile
Hard concrete generally requires softer-bond tooling so the matrix can expose fresh diamonds. Soft or abrasive concrete generally requires a harder bond to control segment wear.
Using the wrong bond may cause glazing, slow production or excessive tooling consumption.
Conventional metal-bond diamonds may also be inefficient when removing thick adhesives, membranes or heavy coatings. These applications may require PCD tooling or another specialised removal tool.
Mistake 3: Leaving Laitance on the Surface
Laitance is a weak layer of cement fines that can form on the surface of concrete.
A coating applied over laitance may initially look acceptable, but its bond is limited by the strength of the weak layer underneath. If the laitance separates from the slab, the coating comes away with it.
Mechanical preparation should continue until weak surface material has been removed and sound concrete is exposed.
A floor is not properly prepared simply because it looks evenly scratched.
Mistake 4: Failing to Remove All Dust
Concrete dust acts as a bond breaker between the primer and the prepared surface.
After grinding, the floor may appear clean while still holding fine dust inside the surface profile, cracks and pores. Sweeping alone is rarely sufficient.
Use a suitable industrial H-class dust extractor during dry grinding and thoroughly vacuum the floor before applying the coating.
Pay particular attention to:
- Corners
- Edges
- Saw cuts
- Cracks
- Control joints
- Floor-to-wall junctions
- Bolt holes and penetrations
Avoid blowing concrete dust around the work area with compressed air.
Mistake 5: Ignoring Oil and Chemical Contamination
Grinding the visible surface does not always remove contamination that has penetrated deeply into the concrete.
Oil, grease and chemicals may remain inside the slab and later interfere with coating adhesion. Contamination can also be spread across the floor when unsuitable grinding methods are used.
Heavily contaminated areas may require:
- Degreasing
- Repeated mechanical preparation
- Localised concrete removal
- Specialised primers
- Testing before installation
If contamination cannot be removed reliably, the affected concrete may need to be replaced.
Mistake 6: Applying Coatings Over Damp Concrete
Moisture can move through concrete even when the surface appears dry.
Possible sources include:
- Moisture within newly placed concrete
- Ground moisture
- Missing or damaged vapour barriers
- Plumbing leaks
- External water entry
- Hydrostatic pressure
- Washing completed shortly before application
Excess moisture can cause:
- Blistering
- Bubbling
- Delamination
- Discolouration
- Cloudiness
- Osmotic blistering
- Loss of adhesion
Do not rely on appearance or touch alone. Test the concrete using a method appropriate for the specified flooring system, and follow the coating manufacturer’s moisture limits.
A moisture-tolerant primer can help in certain conditions, but it is not a universal solution for active water pressure or uncontrolled moisture.
Mistake 7: Producing the Wrong Surface Profile
Different coatings require different surface profiles.
A thin coating may not hide deep grinder marks. A high-build system may require a more aggressive profile to achieve reliable adhesion.
If the profile is too smooth, the coating may not develop sufficient mechanical bond. If it is too aggressive, additional material may be required to fill the surface and achieve the desired finish.
Before starting, confirm:
- The coating manufacturer’s required profile
- The specified application thickness
- Whether the system includes a primer
- The condition and strength of the concrete
- The final appearance required
The objective is not to grind as aggressively as possible. It is to create the correct profile for the selected system.
Mistake 8: Missing the Edges
The main floor may be prepared correctly while edges, corners and areas around fixtures receive limited attention.
These locations are common starting points for coating failure.
Use suitable hand grinders and edge tooling to prepare:
- Walls and columns
- Doorways
- Stairs
- Drains
- Penetrations
- Machinery bases
- Floor joints
- Areas the main grinder cannot reach
Edge preparation should produce a profile that is reasonably consistent with the main floor.
Mistake 9: Coating Weak or Damaged Concrete
A coating system cannot strengthen badly deteriorated concrete unless it has been specifically designed and engineered to do so.
Before coating, inspect the slab for:
- Cracks
- Hollow or delaminated areas
- Spalling
- Rain-damaged concrete
- Soft or dusty surfaces
- Impact damage
- Damaged joints
- Previous repairs
- Low spots that hold water
Weak concrete should be removed or repaired using a compatible method and repair material.
If a pull-off failure occurs within the concrete rather than at the coating interface, the underlying slab may not have enough strength to support the system.
Mistake 10: Filling Cracks Without Understanding Their Cause
Not every crack should be treated in the same way.
A hairline shrinkage crack is different from an active structural crack or a moving joint. Rigidly filling a moving crack does not prevent future movement; it may simply cause the repair or coating to crack again.
Before repairing, determine whether the crack is:
- Dormant or active
- Structural or non-structural
- Contaminated
- Moisture-bearing
- Part of a designed joint
- Continuing through the slab
Where movement is expected, specialist advice or a flexible treatment may be required.
Mistake 11: Preparing Too Early
Concrete can become contaminated again after preparation.
Other trades may introduce:
- Dust
- Plaster
- Paint
- Silicone
- Oil
- Tyre marks
- Water
- Foot traffic
- Construction debris
Whenever possible, prepare the floor close to the planned coating application. Protect prepared areas and inspect them again immediately before priming.
If there is any doubt about the condition of the floor, vacuum and reassess it before proceeding.
Mistake 12: Ignoring the Product Data Sheet
Experience is valuable, but it does not replace the current technical requirements for the product being installed.
Always check the manufacturer’s documentation for:
- Surface-preparation requirements
- Concrete Surface Profile
- Moisture limits
- Minimum concrete age
- Mixing instructions
- Coverage rates
- Application temperatures
- Recoat windows
- Primer requirements
- Cure times
A method that works for one coating system may not be suitable for another.
Warning Signs of Poor Preparation
Problems may become visible during preparation or shortly after coating.
Warning signs include:
- Grinding tools sliding without cutting
- Uneven scratch patterns
- Remaining glossy patches
- Persistent dust
- Dark oil stains
- Soft or powdery concrete
- Moisture appearing in cracks
- Primer separating or forming beads
- Pinholes or bubbles
- Coating peeling during inspection
Do not cover warning signs and hope the next coat will solve them. Stop, identify the cause and correct the floor before continuing.
A Practical Surface-Preparation Process
Although every project is different, a professional process generally includes:
- Inspect the concrete and identify contamination, damage and moisture risks.
- Review the coating manufacturer’s technical requirements.
- Complete moisture and other required tests.
- Select the correct grinder and diamond tooling.
- Perform a small test area.
- Remove coatings, contamination, laitance and weak concrete.
- Prepare edges, corners and difficult-to-access areas.
- Repair cracks and damaged sections using compatible materials.
- Thoroughly vacuum the floor with suitable dust-extraction equipment.
- Inspect the final surface profile before applying the primer.
Photographing the prepared floor and recording test results can also provide valuable project documentation.
The Real Cost of Poor Preparation
Reducing preparation time may make a quotation look more competitive, but coating failure is far more expensive than preparing the floor correctly the first time.
Failure can result in:
- Return visits
- Removal of the failed coating
- Replacement materials
- Additional labour
- Lost production time
- Damage to the contractor’s reputation
- Disputes over responsibility
- Warranty claims
- Loss of future work
The cost of additional grinding or testing is minor compared with replacing an entire flooring system.
Surface-Preparation Equipment from Diamond Tool Warehouse
Diamond Tool Warehouse supplies professional equipment and tooling for concrete grinding, coating removal and floor preparation, including:
- Diamond grinding shoes
- PCD coating-removal tools
- Cup wheels
- Floor grinders
- Hand-grinding equipment
- H-class dust extractors
- Continuous dust bags
- Edge-grinding tools
- Concrete repair and preparation products
The correct equipment combination depends on the grinder, concrete hardness, existing surface and coating specification.
Final Takeaway
Most concrete coating failures do not begin in the topcoat. They begin underneath it.
A floor that looks clean is not necessarily ready to coat. The concrete must be sound, properly profiled, free from contamination and within the moisture limits of the selected system.
Professional surface preparation requires the right inspection, testing, machinery, diamond tooling and dust extraction. Done properly, it creates the foundation for a flooring system that performs as intended.
For help selecting concrete grinding and surface-preparation equipment, contact the team at Diamond Tool Warehouse.
Why You Need an H-Class Vacuum and Air Scrubber for Concrete Grinding
Concrete grinding, cutting and surface preparation can release large quantities of extremely fine concrete dust into the workplace. While visible dust is an obvious problem, the particles presenting the greatest health risk may be too small to see.
Concrete, mortar, bricks, tiles and many masonry products contain crystalline silica. When these materials are ground, cut or mechanically prepared, they can release respirable crystalline silica dust.
These microscopic particles can travel deep into the lungs and may contribute to serious and irreversible illnesses, including silicosis, lung cancer and chronic obstructive pulmonary disease.
Effective concrete grinding dust control requires more than placing a standard vacuum near the grinder.
Every dry concrete grinding job should use a properly matched H-Class dust extractor connected directly to the grinder. When grinding indoors or inside an enclosed area, an appropriately sized air scrubber should also be used to filter fine particles that escape into the surrounding air.
These machines perform two different but complementary jobs:
- The H-Class dust extractor captures concrete dust at the grinder.
- The air scrubber filters airborne particles throughout the work area.
The H-Class dust extractor controls dust at its source. The air scrubber helps control escaped dust throughout the room.
For safer indoor concrete grinding, you need both.
What Is an H-Class Dust Extractor?
An H-Class dust extractor—often called an H-Class vacuum—is an industrial dust-collection machine designed to capture and contain hazardous dust.
During dry concrete grinding, the extractor connects directly to the concrete grinder through an appropriate extraction hose.
As the grinding machine removes material, the extractor creates airflow through the grinder’s dust shroud. This pulls dust away from the grinding head and transports it into the extractor before it can spread throughout the room.
This process may be referred to as:
- On-tool dust extraction
- Source capture
- Local exhaust ventilation
- Grinder dust extraction
- Concrete dust extraction
Capturing dust at the grinding head is the most important part of a dry concrete grinding dust-control system.
A properly matched H-Class dust extractor can help:
- Capture concrete dust as it is generated
- Reduce dust entering the operator’s breathing zone
- Prevent dust from spreading across the job site
- Improve visibility around the grinder
- Reduce contamination of walls and equipment
- Make final cleaning faster and easier
- Filter and contain hazardous fine dust
- Reduce dust exposure during normal grinding operations
- Safely contain collected material when used with the correct bagging system
An H-Class Vacuum Should Be Used Every Time
Diamond Tool Warehouse recommends using a properly matched H-Class dust extractor every time concrete is ground using dry methods.
A standard workshop or domestic vacuum is not suitable for collecting hazardous concrete dust. Even a domestic vacuum advertised as having a HEPA filter may not have the construction, sealing, airflow, filtration classification or disposal system required for professional silica dust extraction.
Using an H-Class extractor every time provides a clear and consistent safety standard. It also removes uncertainty about whether a lower-class machine is appropriate for a particular grinder or project.
However, an H-Class rating alone does not guarantee effective dust control.
The extractor must also:
- Provide sufficient airflow for the concrete grinder
- Be connected to a correctly fitted dust shroud
- Use suitable, undamaged extraction hoses
- Have clean and properly installed filters
- Include a suitable dust-containment system
- Be operated according to the manufacturer’s instructions
- Be inspected and maintained regularly
An undersized, blocked or poorly maintained H-Class extractor may not capture dust effectively.
H-Class extraction should be the minimum starting point for dry concrete grinding—not an optional upgrade.
What Is an Air Scrubber?
An air scrubber is a portable air-filtration machine designed to remove fine airborne particles from the surrounding environment.
The machine draws contaminated air through a series of filters before returning filtered air to the work area or exhausting it outside a contained zone.
Unlike an H-Class dust extractor, an air scrubber is not normally connected directly to the concrete grinder. It filters the general air inside the room or controlled work zone.
An air scrubber can help:
- Capture fine particles that escape the grinder’s dust shroud
- Reduce airborne concrete dust inside enclosed areas
- Improve visibility during grinding
- Reduce dust spreading into adjoining rooms
- Filter dust disturbed during cleanup
- Support properly designed contained work areas
- Support negative-air arrangements
- Improve general site cleanliness
- Provide additional protection for nearby workers and building occupants
The air scrubber acts as a secondary line of defence. It helps manage dust that was not successfully captured by the grinder’s on-tool extraction system.
H-Class Dust Extractor vs Air Scrubber
An H-Class dust extractor and an air scrubber are not interchangeable.
| Equipment | Primary purpose | How it is used |
|---|---|---|
| H-Class dust extractor | Captures concrete dust at its source | Connected directly to the concrete grinder |
| Air scrubber | Filters escaped airborne particles | Positioned inside or ducted from the work area |
| Complete dust-control system | Controls dust at the grinder and throughout the room | Uses both machines together |
An air scrubber should never be treated as a replacement for an H-Class dust extractor.
Without an extractor connected directly to the grinder, large quantities of concrete dust may enter the work area before the air scrubber has an opportunity to filter it. Workers may already be exposed while the air scrubber attempts to clean contaminated air.
The first priority must always be capturing dust at the grinding head.
Capture concrete dust at its source first. Then filter the surrounding air.
Why Isn’t an H-Class Dust Extractor Enough by Itself?
An H-Class dust extractor is essential for dry concrete grinding, but no extraction system captures every particle.
Concrete dust can escape because of:
- Gaps between the grinder shroud and the floor
- Grinding against walls and edges
- Uneven or damaged concrete
- Cracks and expansion joints
- Worn or incorrectly adjusted dust skirts
- An undersized dust extractor
- Incorrect hose diameter
- Excessive hose length
- Blocked, crushed or kinked hoses
- Dirty or overloaded filters
- Overfilled dust bags
- Poor grinder technique
- Disconnected hoses
- Aggressive coating-removal tooling
- Changing grinding shoes or tooling
- Replacing bags and filters
- Cleaning equipment after grinding
Dust can also be disturbed when workers walk through the area, move hoses or use unsuitable cleaning methods.
Once fine concrete dust becomes airborne, it may remain suspended and travel beyond the immediate grinding zone. An air scrubber helps filter this escaped material before it settles throughout the building or moves into occupied areas.
Why Isn’t an Air Scrubber Enough by Itself?
An air scrubber filters dust after it has escaped into the surrounding air. It does not provide direct dust extraction at the grinder.
Operating a concrete grinder without on-tool extraction can release a large amount of dust directly into the operator’s breathing zone.
An air scrubber may eventually filter some of that airborne dust, but it cannot prevent the initial release. It should therefore be used as an additional control—not as a substitute for H-Class extraction.
For dry concrete grinding:
- Connect a properly matched H-Class dust extractor to the grinder.
- Capture as much dust as possible at the grinding head.
- Use an air scrubber to filter escaped airborne particles.
- Apply suitable isolation, cleaning and respiratory protection measures.
Five Reasons You Need Both for Indoor Concrete Grinding
1. Dust is captured directly from the grinder
The H-Class dust extractor pulls dust through the grinder’s shroud before it spreads throughout the work area.
2. Escaped particles are filtered from the room
The air scrubber continuously filters airborne particles that bypass the dust shroud or escape during edge grinding, tooling changes and cleanup.
3. The entire work area receives better protection
On-tool extraction primarily controls dust immediately around the grinder. Air filtration helps manage contamination throughout the wider room.
4. Dust is less likely to spread
Airborne concrete dust can move through doorways, corridors, ventilation systems and gaps in temporary barriers. Correct air scrubber placement can help reduce this movement.
5. Nearby workers receive additional protection
The grinder operator is not the only person who may be exposed. Other trades, cleaners, clients and building occupants may encounter dust that travels beyond the grinding area.
Using an H-Class dust extractor and air scrubber together creates a more complete concrete dust-control system.
Recommended Indoor Concrete Grinding Setup
A safer indoor concrete grinding setup should include:
- Concrete grinder with a correctly adjusted dust shroud
- Properly matched H-Class dust extractor
- Suitable anti-static or heavy-duty extraction hose
- Effective filter-cleaning system
- Clean and correctly installed filters
- Sealed or continuous-bag dust-disposal system
- Appropriately sized air scrubber
- Isolation barriers around the work area
- Suitable respiratory protective equipment where required
- Silica risk assessment
- Site-specific safe work method statement
- Appropriate cleaning and waste-disposal procedures
Simply owning an H-Class dust extractor does not automatically create a safe grinding system. The equipment must provide sufficient airflow, be correctly connected and remain properly maintained throughout the job.
How to Match an H-Class Extractor to a Concrete Grinder
One of the most common mistakes is selecting an extractor based only on motor wattage.
The extractor must provide enough airflow and suction for the grinder, tooling and work being performed.
Consider:
- Grinder size
- Grinder motor power
- Grinding width
- Number of grinding heads
- Manufacturer airflow requirements
- Concrete hardness
- Tooling type
- Material-removal rate
- Hose diameter
- Hose length
- Filter surface area
- Filter-cleaning system
- Dust-storage capacity
- Available power supply
A small hand grinder and a large planetary concrete grinder do not create the same volume of dust.
Aggressive PCD tooling, coarse diamond segments and coating-removal tools can remove material quickly and create a heavy dust load. Large planetary floor grinders generally require considerably more extraction capacity than compact single-head machines.
If the extractor cannot maintain adequate airflow, dust may begin escaping around the grinder’s shroud.
Why Hose Diameter and Length Matter
The hose connecting the concrete grinder to the H-Class dust extractor is an important part of the extraction system.
Using an excessively long, narrow or damaged hose can restrict airflow and reduce dust capture.
To maintain performance:
- Use the hose diameter recommended by the equipment manufacturer
- Keep the hose as short as reasonably practical
- Avoid tight bends and kinks
- Inspect hoses for holes and split connections
- Keep the inside of the hose clear
- Secure every connection
- Use suitable anti-static equipment where required
A powerful dust extractor cannot perform properly if airflow is restricted before the dust reaches the machine.
How to Position an Air Scrubber
Correct air scrubber placement is essential.
Position the air scrubber where it can draw contaminated air away from the operator without blowing dust across the room.
Avoid directing its clean-air outlet where it could:
- Blow directly over the grinding area
- Disturb settled concrete dust
- Push contaminated air towards workers
- Spread dust into adjoining rooms
- Interfere with the grinder’s dust shroud
- Create unwanted turbulence around containment barriers
Where possible, create airflow that moves contaminated air away from workers and towards the air scrubber’s intake.
On contained projects, an air scrubber may also form part of a negative-air system.
Using an Air Scrubber for Negative Air
A negative-air arrangement generally involves exhausting filtered air outside the contained work zone. This helps encourage air to flow into the controlled area instead of allowing contaminated air to escape.
A negative-air system can help reduce dust movement into:
- Adjoining rooms
- Hallways
- Occupied spaces
- Air-conditioning systems
- Other contractors’ work areas
- Public areas
Negative-air systems require proper planning. Machine capacity, room size, duct length, filtration, make-up air and the required number of air changes must all be considered.
Simply placing an air scrubber in a room does not automatically create effective negative pressure.
How to Calculate Air Changes per Hour
When selecting an air scrubber for concrete dust, consider the machine’s rated airflow and the volume of the work area.
Air changes per hour indicate how often the machine can theoretically process the room’s air volume.
Use this calculation:
Air changes per hour = air scrubber airflow per hour ÷ room volume
For example, a room measuring 10 metres long, 8 metres wide and 3 metres high has a volume of:
10 × 8 × 3 = 240 cubic metres
An air scrubber rated at 1,200 cubic metres per hour would theoretically provide:
1,200 ÷ 240 = 5 air changes per hour
This is a simplified calculation. Actual performance can be affected by:
- Filter condition
- Ducting
- Room layout
- Open doorways
- Air leakage
- Machine placement
- Dust volume
- Obstructions
- Airflow restrictions
Large or heavily contaminated work areas may require multiple air scrubbers.
Filters and Maintenance Matter
Even a high-quality H-Class dust extractor will lose performance if it is not correctly maintained.
Check the following before and during every grinding job:
- Filters are correctly installed
- Filters are not damaged
- Seals and gaskets are in good condition
- Hoses are clear and undamaged
- Hose connections are secure
- The grinder shroud is correctly adjusted
- Dust bags are not overfilled
- Filter-cleaning systems operate correctly
- Airflow remains adequate
- Warning indicators are not ignored
A clogged filter reduces airflow. When airflow falls, less dust is captured at the grinder—even if the extractor motor still sounds normal.
Always follow the manufacturer’s instructions for filter inspection, cleaning and replacement.
The Benefits of Automatic or Jet-Pulse Filter Cleaning
Concrete dust can quickly accumulate on a dust extractor’s filters. As the filter becomes loaded, airflow and extraction performance may fall.
An automatic or jet-pulse filter-cleaning system helps remove built-up dust from the filter surface so the extractor can maintain more consistent suction.
Effective filter cleaning can:
- Maintain stronger airflow
- Reduce unnecessary downtime
- Improve dust capture
- Extend filter life
- Reduce manual filter handling
- Improve productivity on larger grinding jobs
Filter cleaning does not eliminate the need for inspection and maintenance. Damaged or excessively loaded filters must still be replaced according to the manufacturer’s instructions.
Safely Disposing of Concrete Dust
Concrete dust does not stop being hazardous after it enters the extractor.
Changing bags or handling contaminated filters can release concentrated dust directly into the operator’s breathing zone.
To reduce exposure:
- Never overfill dust bags
- Seal bags before removing them from the controlled area
- Follow the manufacturer’s bag-changing procedure
- Use sealable or continuous-bag systems where appropriate
- Avoid shaking dusty filters
- Wear suitable respiratory protection when required
- Never use compressed air to clean filters or clothing
- Dispose of collected material according to site and local requirements
Continuous-bag systems allow operators to seal individual sections of the bag before removal. This can reduce direct contact with collected dust and minimise dust release during disposal.
Never Dry Sweep Concrete Dust
Dry sweeping can return settled silica-containing dust to the air, creating another exposure risk after grinding has stopped.
Safer cleaning methods can include:
- Vacuuming with an appropriate industrial H-Class vacuum
- Wet cleaning where suitable
- Vacuuming surfaces before removing containment barriers
- Keeping the air scrubber operating during final cleanup
- Cleaning tools before taking them out of the controlled area
Do not use compressed air or a blower to move concrete dust around the work area.
Can You Use a Domestic Vacuum for Concrete Grinding?
No. A domestic vacuum cleaner should not be used to collect hazardous concrete grinding dust.
Even when advertised as having a HEPA filter, a domestic vacuum may not have:
- A certified H-Class filtration system
- Adequate airflow for a concrete grinder
- Properly sealed construction
- Safe filter-cleaning features
- Appropriate dust-containment bags
- Industrial durability
- Suitable hoses and connections
Concrete grinding requires a purpose-built industrial dust extractor that can safely capture, filter and contain fine hazardous dust.
Do You Still Need Respiratory Protection?
Using an H-Class dust extractor and air scrubber does not automatically eliminate the need for respiratory protective equipment.
RPE requirements can depend on:
- The task being performed
- Duration of the work
- Whether grinding occurs indoors or outdoors
- Silica content of the material
- Effectiveness of engineering controls
- Air-monitoring results
- Site conditions
- Applicable legislation and codes of practice
- The project’s risk assessment and SWMS
Where tight-fitting respiratory protection is required, workers must be fit-tested for the specific make and model being worn. Facial hair must not interfere with the respirator’s sealing surface.
PPE is an important part of a dust-control system, but it should not replace effective engineering controls.
Australian Silica Dust Requirements
Australian businesses must manage risks associated with respirable crystalline silica.
The precise controls required depend on the state or territory, material, task and working conditions. Contractors must consult the WHS legislation and codes of practice applying to their location and conduct a job-specific risk assessment.
Regardless of the minimum regulatory requirements for a particular task, Diamond Tool Warehouse recommends using H-Class extraction every time concrete is ground using dry methods.
For indoor and enclosed concrete grinding, an air scrubber provides an important additional level of airborne-dust control. However, it does not replace the H-Class extractor connected directly to the grinder.
Common Concrete Grinding Dust-Control Mistakes
Avoid these common mistakes:
- Grinding concrete without an H-Class dust extractor
- Using an air scrubber instead of on-tool extraction
- Assuming an H-Class label guarantees sufficient airflow
- Connecting a large grinder to an undersized extractor
- Using excessively long or narrow hoses
- Continuing to grind with blocked filters
- Operating with a damaged dust skirt
- Removing the grinder’s shroud to reach edges
- Dry sweeping after grinding
- Cleaning equipment with compressed air
- Emptying loose dust directly into a bin
- Overfilling dust-collection bags
- Turning off the air scrubber immediately after grinding
- Allowing unnecessary workers into the grinding zone
- Relying only on disposable masks
- Ignoring manufacturer maintenance instructions
Effective silica dust control depends on the complete system—not one machine, filter or safety label.
Frequently Asked Questions
Should an H-Class vacuum be used every time concrete is ground?
Yes. Diamond Tool Warehouse recommends using a properly matched H-Class dust extractor every time concrete is ground using dry methods.
The extractor should be connected directly to the grinder through a correctly fitted dust shroud and suitable extraction hose.
Do I need an air scrubber when grinding concrete indoors?
An air scrubber should be used as an additional dust-control measure for indoor and enclosed concrete grinding.
The H-Class extractor captures dust at the grinder, while the air scrubber filters fine particles that escape into the surrounding work area.
Does an air scrubber replace an H-Class vacuum?
No. An air scrubber filters airborne particles inside the work area. It does not capture dust directly from the grinding head.
Always use an H-Class dust extractor for dry concrete grinding. Add an appropriately sized air scrubber for indoor or enclosed work.
Can I use a standard workshop vacuum?
No. Standard workshop and domestic vacuum cleaners are not suitable for hazardous concrete grinding dust.
Use a purpose-built H-Class industrial dust extractor with sufficient airflow for the concrete grinder.
What size H-Class dust extractor do I need?
The correct extractor depends on:
- Grinder size
- Grinding width
- Number of grinding heads
- Tooling
- Material-removal rate
- Hose diameter and length
- Manufacturer airflow requirements
Large planetary grinders generally require considerably more extraction capacity than small hand grinders.
How long should an air scrubber operate after grinding?
The required operating time depends on the room volume, air scrubber capacity, dust levels, containment and number of air changes per hour.
Keeping the air scrubber operating during final cleaning can help capture dust disturbed after grinding has stopped. A site-specific risk assessment should determine when the area can be safely reopened.
Is a HEPA vacuum automatically an H-Class vacuum?
No. A vacuum containing a HEPA filter is not automatically an H-Class dust extractor.
H-Class classification applies to the complete machine and its ability to safely capture and contain hazardous dust—not only the filter material.
Control Dust at the Grinder and Throughout the Room
Every dry concrete grinding job should begin with a properly matched H-Class dust extractor connected directly to the grinder.
For indoor and enclosed projects, an appropriately sized air scrubber should also be used to filter fine particles that escape into the surrounding work area.
- The H-Class dust extractor captures silica-containing dust at the grinding head.
- The air scrubber filters fine airborne particles throughout the room.
- Appropriate isolation, cleaning, maintenance and PPE complete the dust-control system.
One machine controls dust at its source. The other helps control escaped dust throughout the workplace.
Every dry concrete grinding job needs H-Class extraction. Indoor and enclosed grinding jobs should also use an air scrubber for more complete concrete dust control.
Diamond Tool Warehouse supplies professional concrete grinders, H-Class dust extractors, air scrubbers, extraction hoses, diamond grinding tools and safety equipment for demanding floor-preparation projects across Australia.
Need help selecting the right equipment? Contact Diamond Tool Warehouse for assistance matching your concrete grinder with a suitable H-Class dust extractor and air scrubber.
Disclaimer: This article contains general information and does not constitute legal or workplace health and safety advice. Always follow the equipment manufacturer’s instructions, complete a site-specific risk assessment and comply with the WHS legislation and codes of practice applying in your state or territory.
Concrete Densifier: What It Does and When to Apply It
Concrete densifier is an important part of many polished-concrete and floor-hardening systems, but it is often confused with concrete sealer.
A densifier penetrates the surface and reacts within the concrete. A sealer forms a protective barrier that helps resist liquids and staining. They perform different jobs, and in some flooring systems both products may be required.
This guide explains what concrete densifier does, when to apply it and how to avoid common application mistakes.
What Is a Concrete Densifier?
Concrete densifier is a liquid chemical treatment designed to penetrate concrete and react with available calcium compounds inside the slab.
Most densifiers are based on sodium, potassium or lithium silicate. When applied correctly, the silicate reacts within the concrete and helps form additional cementitious material inside its pores.
This process can help:
- Harden the concrete surface
- Reduce surface dusting
- Improve abrasion resistance
- Reduce concrete porosity
- Strengthen weak surface paste
- Support the concrete polishing process
- Improve the floor’s ability to develop a polished finish
Concrete densifier does not create a thick coating on top of the floor. It works within the concrete itself.
What Does Concrete Densifier Actually Do?
Concrete naturally contains microscopic pores and unreacted compounds. A silicate densifier penetrates these pores and reacts with available calcium hydroxide to form additional calcium silicate hydrate, commonly called C-S-H.
C-S-H is the same type of cementitious material that gives cured concrete much of its strength. Creating more of it near the surface helps make the concrete denser, harder and less prone to dusting.
The result is not normally dramatic immediately after application. The main benefits develop as the chemical reaction takes place and the floor continues through the polishing process.
Sodium, Potassium and Lithium Densifiers
Diamond Tool Warehouse supplies the Conpell DuraShield range of concrete densifiers and surface hardeners, with sodium, potassium and lithium formulations available in multiple container sizes. View DuraShield densifiers and surface hardeners
Sodium-silicate densifier
Sodium silicate is a traditional and economical option used for hardening and dust-proofing concrete.
It can be suitable for:
- Large commercial areas
- Warehouses
- Industrial floors
- General concrete hardening
- Projects where product cost is a major consideration
Careful application and removal of excess material are important because overapplication can leave residue on the floor.
Potassium-silicate densifier
Potassium silicate is another penetrating densifier used to improve surface hardness and reduce dusting.
It can offer good penetration and is often used for:
- Commercial concrete floors
- Polished-concrete projects
- Surface hardening
- Concrete floors requiring improved abrasion resistance
Lithium-silicate densifier
Lithium silicate contains smaller particles and is widely used in polished-concrete systems.
It is commonly selected for:
- Mechanically polished concrete
- Floors requiring good penetration
- Projects where reducing surface residue is important
- Later-stage concrete refinement systems
No single chemistry is automatically best for every floor. The condition and porosity of the concrete, the polishing system and the manufacturer’s instructions should determine which product is used.
When Should Concrete Densifier Be Applied?
The correct application point depends on the floor and the polishing system.
In many polished-concrete systems, densifier is applied after the initial coarse grinding stages have opened the concrete but before the final polishing stages begin.
A typical process may include:
- Coarse metal-bond grinding
- Repairs and grouting where required
- Intermediate grinding or honing
- Thorough cleaning
- Application of concrete densifier
- Adequate reaction and drying time
- Continued honing and polishing
- Application of a stain protector or sealer, if required
- Final burnishing
Some contractors apply densifier after approximately the 80, 100 or 200-grit stage. However, this is not a universal rule. The correct stage depends on the tooling system, concrete condition and selected densifier.
Applying it too early may result in some treated material being removed during later aggressive grinding. Applying it too late may reduce penetration because the surface has already become highly refined.
Always follow the product technical data sheet and the requirements of the complete polishing system.
Can Densifier Fix Soft Concrete?
Densifier can considerably improve a soft, porous or dusty concrete surface, but it has limits.
On suitable concrete, densifier can:
- Harden weak surface paste
- Reduce dusting
- Improve abrasion resistance
- Reduce rapid wear during polishing
- Help the floor accept later polishing stages
- Improve the clarity and durability of the final finish
A highly porous floor may absorb densifier quickly and require more product than dense concrete. Additional applications may sometimes be needed, provided the manufacturer permits them.
However, densifier cannot repair every weak slab. It will not fix:
- Structurally defective concrete
- Deep delamination
- Severe rain damage extending below the surface
- Contaminated or crumbling concrete
- Major cracking or slab movement
- A failed topping or poorly bonded overlay
If the surface can be easily scraped away or continues to break down after grinding, the problem may require deeper removal, repair or replacement—not simply more densifier.
Concrete Densifier vs Concrete Sealer
Although the terms are sometimes used interchangeably, densifier and sealer are not the same product.
| Concrete densifier | Concrete sealer |
|---|---|
| Penetrates and chemically reacts within concrete | Creates a protective treatment at or near the surface |
| Helps harden and strengthen the surface | Helps protect against water, oil and staining |
| Reduces dusting and improves abrasion resistance | Reduces liquid penetration |
| Commonly used during concrete polishing | Usually applied near the end of the system |
| Does not normally create a thick film | May be penetrating or film-forming |
| Does not make concrete completely stain-proof | Provides additional stain and chemical resistance, depending on the product |
A densified floor is not automatically sealed. Even after densification and polishing, concrete may still absorb oil, food, chemicals or coloured liquids.
For commercial, residential or food-service floors, a compatible penetrating guard, stain protector or sealer may still be required.
How Much Concrete Densifier Do You Need?
There is no reliable universal application rate for every concrete floor.
Coverage depends on:
- Concrete porosity
- Surface hardness
- Age and condition of the slab
- How aggressively the floor has been ground
- Product chemistry and concentration
- Application method
- Temperature and environmental conditions
- Whether the floor has previously been treated
Soft or highly porous concrete normally absorbs more densifier than dense, well-finished concrete.
As a general working principle, apply enough material to keep the surface evenly wet for the reaction period specified by the manufacturer. Do not assume that applying more product will produce a harder floor.
Overapplication wastes material and can leave difficult residue. Always calculate the quantity using the coverage rate stated on the selected product’s technical data sheet, then test it on a small representative area.
How to Apply Concrete Densifier
The exact method varies by product, but a typical application process includes the following steps.
1. Prepare the concrete
The floor must be:
- Clean
- Free from dust
- Free from oil and contamination
- Mechanically opened to the correct stage
- Free from incompatible coatings or sealers
Vacuum the floor thoroughly before applying densifier. Dust left on the surface can mix with the liquid and interfere with penetration.
2. Test a small area
Test the product in an inconspicuous section to assess:
- Absorption rate
- Reaction time
- Surface appearance
- Product coverage
- Potential residue
This is particularly important on coloured, decorative or previously treated concrete.
3. Apply an even coat
Apply the densifier evenly using the method recommended by the manufacturer. Depending on the product, this may involve a low-pressure sprayer, microfibre applicator, broom or automatic scrubber.
Avoid allowing the product to collect in low areas.
4. Keep the surface evenly wet
Allow the densifier to remain wet for the specified reaction period. Redistribute material from wet areas to sections absorbing it more quickly.
Do not allow isolated patches to dry prematurely.
5. Remove all excess product
Once the concrete stops absorbing material—or once the required reaction time is complete—remove any unabsorbed densifier as directed by the manufacturer.
This may involve:
- Redistributing excess material
- Scrubbing the surface
- Removing it with a wet vacuum or scrubber
- Rinsing with clean water when required
- Dry buffing, depending on the specified system
Never assume excess densifier can simply dry on the floor.
Why Excess Densifier Must Be Removed
One of the most common application mistakes is allowing unabsorbed densifier to dry on the concrete.
This can leave:
- White residue
- Hazy patches
- Sticky areas
- Uneven colour
- Hardened deposits
- Marks that become difficult to remove
- Problems during later polishing stages
More densifier does not necessarily mean better performance. Once the floor has absorbed what it can accept, the remaining liquid must be managed correctly.
If residue forms, it may require mechanical scrubbing, water, cleaning chemicals or additional grinding to remove. Follow the manufacturer’s instructions rather than experimenting with strong acids or incompatible cleaners.
Densifier’s Role in Polished Concrete
Densifier is important in polished-concrete systems because polishing progressively refines the concrete surface. If the surface paste is too soft, it can continue to break down instead of developing a clean, consistent polish.
A correctly densified floor can provide:
- A harder surface for polishing
- Improved abrasion resistance
- Reduced dust generation
- Better polishing-pad performance
- Improved clarity and light reflection
- A more durable finished floor
- Reduced maintenance compared with untreated dusty concrete
Densifier does not create shine by itself. The shine is developed through the mechanical refinement of the concrete using progressively finer diamond tooling.
A floor that has only been densified but not properly polished should not be expected to have the appearance of mechanically polished concrete.
Common Densifier Application Mistakes
Avoid these frequent problems:
- Applying densifier over dust or contamination
- Using densifier over an existing sealer
- Applying it before the concrete has been sufficiently opened
- Applying it so late that penetration is limited
- Allowing puddles to form
- Letting excess product dry on the surface
- Assuming every floor has the same coverage rate
- Applying repeated coats without checking manufacturer instructions
- Expecting densifier to repair structurally failed concrete
- Assuming a densified floor is automatically stain-proof
- Continuing to polish before the product is ready
Choosing the Right Densifier
Before purchasing a concrete densifier, consider:
- Whether the floor will be mechanically polished
- The hardness and porosity of the concrete
- Whether the floor is dusty or rain-damaged
- The required abrasion resistance
- Whether a sealer or stain protector will be applied later
- The total floor area
- The specified polishing system
- Whether sodium, potassium or lithium silicate is preferred
Diamond Tool Warehouse supplies Conpell DuraShield Sodium, Potassium and Lithium densifiers in several container sizes, allowing contractors to select a suitable option for smaller projects or large commercial floors.
Get Concrete Densifier from Diamond Tool Warehouse
Diamond Tool Warehouse supplies concrete densifiers, surface hardeners, grinding equipment and diamond polishing tooling to contractors across Australia.
If you are unsure which densifier to use, contact our team with:
- The total floor area
- The condition of the concrete
- Your current grinding stage
- The intended final finish
- Whether the floor will be sealed
- The equipment and polishing system being used
We can help you select the appropriate densifier and calculate the product quantity required for the project.
View DuraShield densifiers and surface hardeners at Diamond Tool Warehouse
At Diamond Tool Warehouse, we pride ourselves on offering some of the best diamond tooling in the industry, and our own Ballistic brand is a key part of that commitment. With over 10 years of working with the same trusted manufacturers, we ensure that the quality of our Ballistic diamond tools is unmatched, offering consistency and performance that you can count on for every job. While other brands may switch manufacturers to cut costs, we remain dedicated to maintaining our relationships with suppliers who help us deliver the reliability and durability our customers expect.
Ballistic: Our Trusted Diamond Tool Brand
Our Ballistic diamond tooling is designed to meet the needs of professionals who demand precision, strength, and long-lasting performance. Whether you’re using Ballistic diamond blades, grinding shoes, or cup wheels, you can trust that each tool has been crafted to exacting standards. We don’t shop around for the cheapest prices, which often compromises quality. Instead, we focus on delivering superior products that can handle the toughest applications, from concrete cutting to surface preparation.
Why Ballistic Stands Out
The Ballistic brand is built on the foundation of consistency and reliability. With over a decade of collaboration with the same manufacturers, we have fine-tuned the production process to create tools that deliver the same exceptional performance every time. When you choose Ballistic, you’re choosing a tool that has been rigorously tested to ensure it can handle even the most demanding projects.
- Precision and Strength: Ballistic tools are engineered for professionals who require accuracy and durability. Whether you’re cutting concrete or polishing stone, Ballistic delivers superior results.
- Consistency: Unlike other brands that change suppliers and sacrifice quality, Ballistic tools are made with the same trusted materials and processes, ensuring that every tool you purchase performs just like the last.
- Reliability: You need tools that perform consistently, and with Ballistic, you can trust that the job will get done right the first time. This reliability translates to better project planning and fewer interruptions on site.
The Problem with Cutting Corners
Many brands choose to switch manufacturers to lower their costs, but the downside is clear: quality suffers. When suppliers change, you may end up with tools that are inconsistent in performance, leading to frustration, downtime, and even potential safety issues. Worse yet, many of these brands don’t pass the savings on to you, the customer. Instead, you’re left paying for tools that don’t perform the way they should.
At Diamond Tool Warehouse, we believe in delivering value. Our Ballistic diamond tools are made to the highest standards, and because we maintain our long-term manufacturing relationships, you can trust that the quality remains consistent. We prioritize performance and reliability, giving you the best value for your money.
Consistency Helps Your Business
When you’re working with tools, you need to know they will perform the same way every time. Ballistic tools provide this level of consistency, allowing you to plan your projects more accurately and avoid unexpected costs.
- Budgeting Confidence: When you know your tools will last and perform as expected, it makes budgeting easier. No sudden breakdowns or need for replacements mean fewer surprises for your business.
- Efficiency: Reliable tools help you complete jobs faster and more efficiently, saving you time and boosting productivity.
- Trust: Your clients depend on you to deliver high-quality results, and when you’re using Ballistic diamond tools, you can trust that you’ll meet their expectations every time.
Why Choose Ballistic from Diamond Tool Warehouse?
Our long-standing relationships with our manufacturers have allowed us to create a brand that reflects our core values: quality, consistency, and reliability. The Ballistic diamond tooling range is the result of years of development, fine-tuning, and dedication to providing our customers with the best tools on the market. From diamond blades to grinding shoes, every Ballistic product is made to perform at the highest level.
Helping You Succeed with High-Quality Diamond Tools
At Diamond Tool Warehouse, we are committed to supporting your success. By offering top-quality tools like those in our Ballistic brand, we ensure that you have the resources you need to get the job done right. We also provide project pricing for large jobs, so you can get the best value for your bulk orders without compromising on quality.
When you choose Ballistic tools from Diamond Tool Warehouse, you’re choosing reliability, performance, and peace of mind. Don’t settle for tools that might let you down—trust Ballistic for consistent, high-quality results every time.
Shop Ballistic and More at Diamond Tool Warehouse
If you’re looking for diamond tools that deliver superior performance, Ballistic is the brand to trust. Explore our full range of Ballistic diamond tools at Diamond Tool Warehouse today, and experience the difference that comes from working with a company that values quality, consistency, and long-term reliability.
At Diamond Tool Warehouse, we are committed to doing our part to protect the environment. We understand the urgent need to reduce plastic waste and are proud to be transitioning towards more sustainable practices across our operations. In line with this, we have moved away from using plastic packaging wherever possible. Our diamond shoe boxes and cup wheel boxes are now made from recyclable cardboard, rather than plastic, helping to reduce our environmental footprint and contribute to a greener future.
Why We’re Going Plastic-Free
Plastic waste is one of the biggest environmental challenges of our time. It can take hundreds of years for plastic to decompose, and during that time, it often ends up polluting oceans, harming wildlife, and contributing to microplastic contamination. By choosing cardboard packaging over plastic, we’re reducing our contribution to this issue.
Cardboard is not only biodegradable but also recyclable, making it a far more environmentally friendly option. This shift to cardboard aligns with our vision of promoting sustainability and helps us play a small but significant role in reducing plastic waste.
Benefits of Cardboard Packaging for the Earth
- Biodegradability: Unlike plastic, which can linger in the environment for centuries, cardboard decomposes much faster and leaves a smaller ecological footprint.
- Recyclability: Cardboard is easily recyclable and can be repurposed into new products, reducing the demand for virgin materials and energy-intensive production processes.
- Lower Carbon Footprint: The production of cardboard uses less energy compared to plastic and produces fewer greenhouse gas emissions.
- Minimal Impact on Wildlife: Cardboard breaks down more naturally and poses less threat to marine and terrestrial wildlife compared to plastic, which is often ingested by animals, leading to health problems or death.
What We’re Doing to Help Make a Greener World
At Diamond Tool Warehouse, we believe that every step towards sustainability counts. We’re not only reducing plastic use but are also evaluating all areas of our operations to minimize our environmental impact. Here’s what we’re doing:
- Cardboard Packaging: All of our diamond shoe and cup wheel boxes are now made from sturdy, recyclable cardboard, offering protection to our products while being kinder to the planet.
- Waste Reduction: We’re working to reduce waste in every aspect of our business, from packaging to operational processes, ensuring we use resources more efficiently.
- Sustainable Sourcing: We are continually exploring ways to source our materials more responsibly, whether that’s through suppliers who share our environmental values or by offering more eco-friendly products.
Why It Matters
Choosing cardboard over plastic is not just about packaging—it’s about making conscious decisions that have a long-lasting, positive effect on the world. The packaging might seem like a small detail, but small changes add up. If more companies commit to reducing plastic, together we can make a real difference for the environment.
Our Commitment
At Diamond Tool Warehouse, we’re dedicated to helping build a sustainable future. We recognize that we have a responsibility to the environment, and we’re committed to continually improving our practices to ensure we’re doing everything we can to reduce our environmental impact. Whether it’s through plastic-free packaging, waste reduction, or energy-efficient processes, we’re making conscious choices to help create a greener world.
By choosing Diamond Tool Warehouse, you’re not only getting top-quality diamond tooling products—you’re also supporting a company that cares about the environment and is taking steps to help protect it. Together, we can make a difference.
Join Us in Building a Greener Future
We invite you to join us on this journey towards a more sustainable future. By supporting businesses that are committed to reducing plastic waste and adopting greener practices, you become part of the solution. Let’s work together to make the world a better, healthier place for future generations.
For more information on our eco-friendly products and packaging, visit Diamond Tool Warehouse today!
Silicosis is an occupational lung disease caused by prolonged exposure and inhalation of crystalline silica dust.
Silica dust are small particles –100 times smaller than a grain of sand–present in materials containing silica. So, what is silica?
It’s a common occurring element in the earth’s crust formed from a combination of silicon and oxygen atoms. It makes up 75% of all element in the earth’s crust. It can be found in:
- A super simple icon list element.
- Products e.g. bricks, tiles, pavers, blocks, concrete, glass and mortar.
- Cement based materials e.g. fibre-cement sheeting.
Activities like crushing, grinding, drilling, breaking, blasting or cutting any of the above materials releases fine silica dust into the air. When inhaled, they find their way to the lungs where they deeply embed themselves. This leads to scarring and inflammation (usually 10mm wide); inhibiting its’ normal functioning and increasing the risk of silicosis.
Signs and symptoms of silicosis include: fever, persistent coughing, chest pain, fatigue, loss of appetite, weight loss, shortness of breath, laboured rapid breathing, darkening and blueing of the skin, and gradual rifts thereafter cracking of the nails.
Silicosis can be classified into 4 groups namely:
- Simple
- Accelerated
- Acute
- Complicated
Simple silicosis occurs 10-40 years after first exposure to low concentration of silica dust.
Accelerated silicosis occurs 5-10 years after first exposure to high concentration of silica dust. It occurs and progresses faster than simple silicosis.
Acute silicosis develops after a few weeks to 5 years of first exposure to extra high concentration of silica gel. It’s highly fatal and often leads to death. Symptoms include shortening of breath, weight loss, and persistent coughing.
Complicated silicosis develops from complication of normal silicosis by lung diseases like TB and smaller inflammations merging together to 1cm size or more.
Dangers of Silicosis
Besides silicosis being fatal, it increases the risk of other diseases like tuberculosis, chronic bronchitis, and lung cancer. The worst part is it has no cure. Prescriptions are merely taken to alleviate symptoms and prevent further progression.
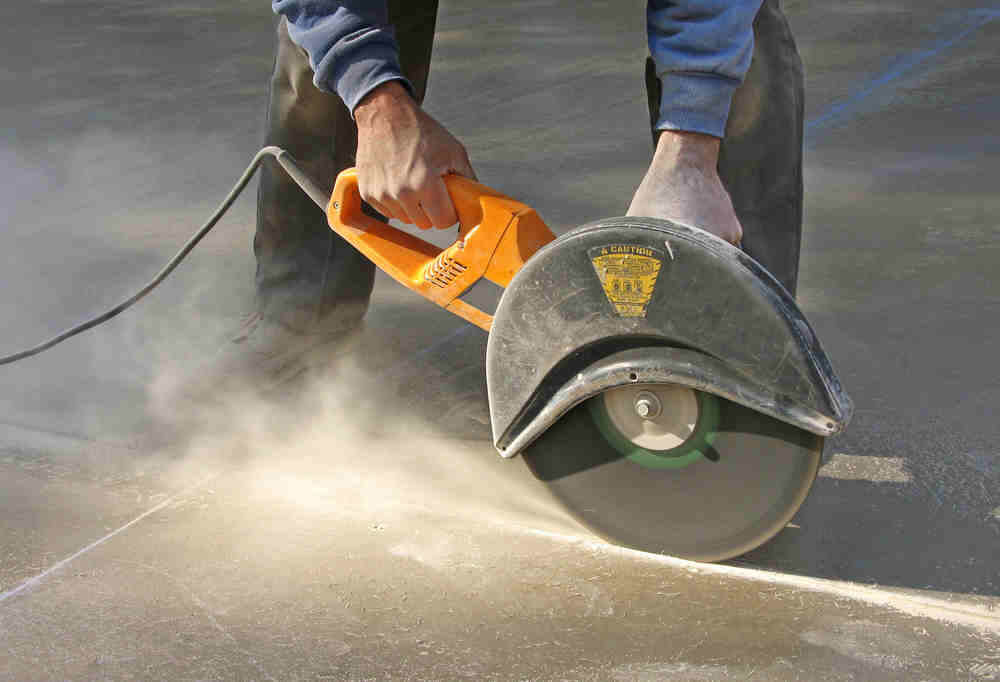
Prevention
Since silicosis has no cure, the next best option is preventing it from developing in the first place.
- Eliminate silica dust in the air. Use of proper ventilation and air filters does just that. According to Workplace Queensland, the acceptable Workplace Exposure Standard for silica dust is 0.1mg/m³ for an average 8hour shift per 5 working days and shouldn’t exceed that.
- Substitute silica materials for non-silica materials.
- Eliminate activities with risk of exposure. Alternatively, reduce time spent on such tasks.
- Control dust. Use an on-tool extraction tool or water suppression. On-tool extraction extracts dust immediately after it’s released while water suppression soaks the dust in water immediately it’s released.
- Use a personal protective equipment. A well-fitting respirator with at least P1 filtration fit tester is recommended. Nevertheless, a respirator shouldn’t be depended on as the primary prevention method, rather, used together with other controls. See what we have in stock click here!
Importance of Prevention of Silicosis
It reduces the risk of fatal diseases like lung cancer, tuberculosis, chronic bronchitis, and silicosis itself. You can easily steer away from all these as long as you follow the tips above.
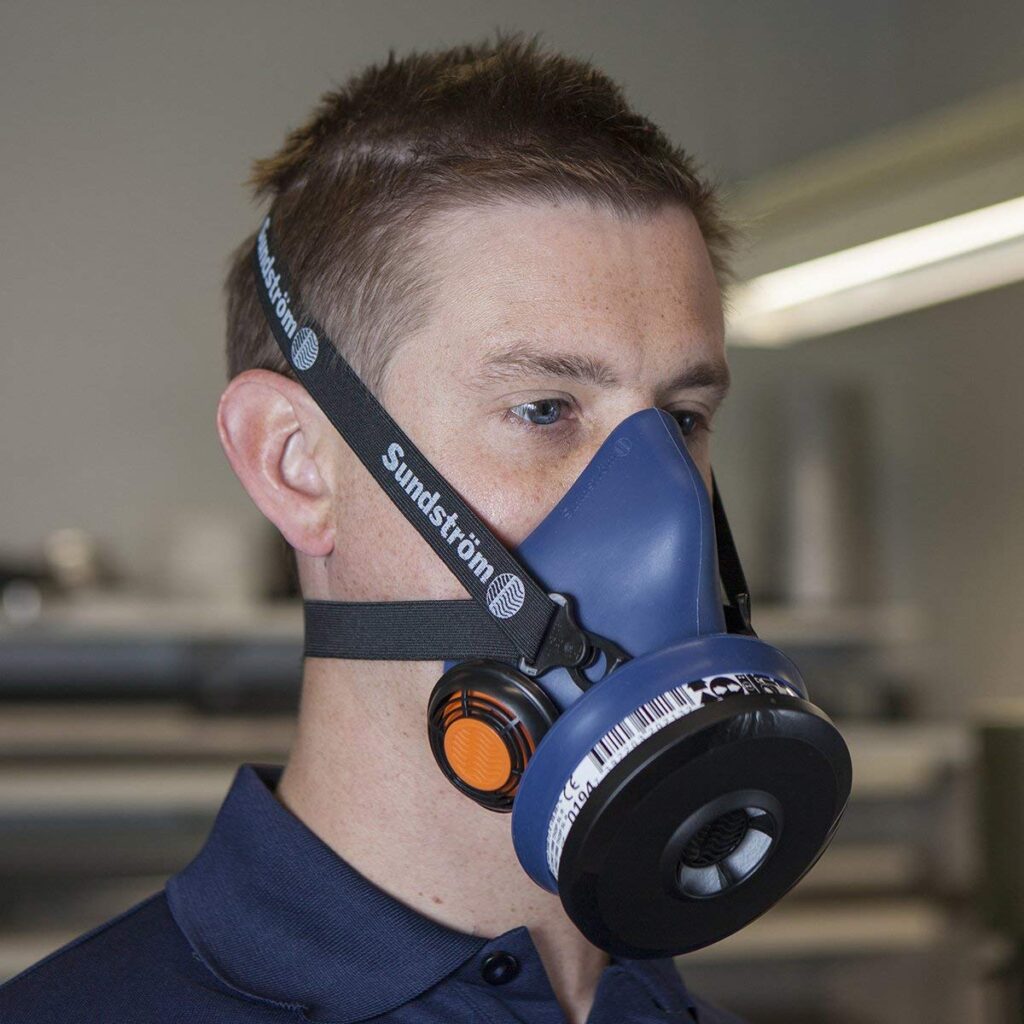
Silicosis is a fatal disease that can be easily avoided. It’s up to you to take all the necessary precautions. As a wise man once said, “it’s better to be safe than sorry”.
For more information on silicosis, please visit Worksafe Queensland.

Unit 3, 478 Scottsdale Dve,
VARSITY LAKES, QLD 4227